{Geesh, is that my theme today? I forgot...lol!} The screen is simply washed out after the desired number of prints are created. You can make as many prints as you'd like, up into the hundreds, by applying more ink when needed. My instructional book mentioned using cold and hot water and I couldn't remember which, so I simply used a luke-water about room temperature and it worked fine. Just set the screen aside to dry and it is ready to go the next time you are --- just hold it up to the light and look for any areas that may need to be filled with the screen filler once again. My screen appears to be in good shape. Rinse your squeegee after returning any leftover ink back to the jars and seal them.
If I do decide to create several prints from one or more screens at a time, I'm going to have to create me some sort of "clothesline" to hang the prints up to dry. I've seen clothespin and bulldog clips used to hang them. HTH's anyone who may be interested..........
Showing posts with label Screenprinting. Show all posts
Showing posts with label Screenprinting. Show all posts
Friday, September 29, 2006


The "Good News" about my screenprinting...
is that all is not lost! I can go back into the screen and fill in some of the areas, such as the inside of the banner and a few other areas that my ink seeped through, however lightly, and refill it. Once it is dry and checked once again, the drawing ink is applied before my flood and print strokes are made.
Oh, and the ink itself, is water-based, and not exactly like the ink a rubberstamper is used to which is more fluid-y and thinner in nature. It is thicker in consistency, comparable to the Golden's Fluid Acrylics in consistency with a touch of gel characteristics. I had to ask Don if it was supposed to be like this, lol. Once mixed with the extender base in a 1:1 ratio, it is ready to be applied to the screen.
As I mentioned before it takes very little. Don applied mine to the screen for me and I was even amazed. He put on a bit more than we need but it can be returned to the bottle afterwards by gently scrapping the squeegee so there is little waste. As far as an amount goes, remember I used a 8x10 frame, so I'd say about a 1/2 teaspoon is plenty. We used a plastic disposable spoon, but from some experience with painting, next time I want to try using a palette knife to spread it across the bottom of the screen the length of my squeegee. Just remember if you try this, the flood stroke is made while the screen is lifted off the object your printed onto, then lowered prior to making the print stroke. It is truly easy!
Also, if you are a mixed media artist who'd like to try this without too much expense, I saw a tutorial on a live journal blog by craftgrrl who used silk screen and embroidery hoop and modge podge to fill the fill the masked areas. It worked great! Here is a link: www.livejournal.com/community/craftgrrl/3674467.html Of course, you'll need the black screen printing ink and possibly the base extender. Enjoy!
Oh, and the ink itself, is water-based, and not exactly like the ink a rubberstamper is used to which is more fluid-y and thinner in nature. It is thicker in consistency, comparable to the Golden's Fluid Acrylics in consistency with a touch of gel characteristics. I had to ask Don if it was supposed to be like this, lol. Once mixed with the extender base in a 1:1 ratio, it is ready to be applied to the screen.
As I mentioned before it takes very little. Don applied mine to the screen for me and I was even amazed. He put on a bit more than we need but it can be returned to the bottle afterwards by gently scrapping the squeegee so there is little waste. As far as an amount goes, remember I used a 8x10 frame, so I'd say about a 1/2 teaspoon is plenty. We used a plastic disposable spoon, but from some experience with painting, next time I want to try using a palette knife to spread it across the bottom of the screen the length of my squeegee. Just remember if you try this, the flood stroke is made while the screen is lifted off the object your printed onto, then lowered prior to making the print stroke. It is truly easy!
Also, if you are a mixed media artist who'd like to try this without too much expense, I saw a tutorial on a live journal blog by craftgrrl who used silk screen and embroidery hoop and modge podge to fill the fill the masked areas. It worked great! Here is a link: www.livejournal.com/community/craftgrrl/3674467.html Of course, you'll need the black screen printing ink and possibly the base extender. Enjoy!
And my first print...
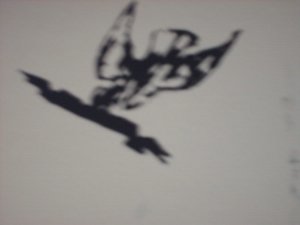 This is my first ever silk screen print! I made a couple mistakes with this but the good news is it can be rectified on the silk screen frame and hopefully my subsequent prints will be a bit better. First, I forgot {there is that word again!} to fill the inside of my banner with screen filler to leave only a small outline of it. Therefore, it printed out black, lol! The second mistake that I made was in my haste to create my first print, I forgot completely about adding in the drawing ink. {Supposedly it assists with the flow of the ink through the screen.}
I'm certain that if I keep with it that I'll continue to improve, like anything else that anyone does --- practice makes perfect! I am a bit envious of some of the silkscreen printing that I've seen, some artists are getting some very fine details within their artwork. Also, I am not aware of anyone that teaches classes in my area, I'd so love to take a few! Maybe, one day I will.


Thursday, September 28, 2006
Back to the screenprinting...
While at K-Mart, I remember to pick up a roll of duct tape to tape up the silk screen frame. Upon arriving home, I sat down and did exactly that. I was so anxious to actually create my first print that I had to mix the extender base and black paint and try it!
My first attempt wasn't so great... so I did it again, and again... the third print, I can live with. But I noticed one mistake. I forgot to seal in the inside of the banner, so guess what happened? Yep, the black ink filled it in. I'll take some photographs later today of the screen frame taped and my first ever print and upload them for you to see. Just remember, I'm new at this, LOL!
My first attempt wasn't so great... so I did it again, and again... the third print, I can live with. But I noticed one mistake. I forgot to seal in the inside of the banner, so guess what happened? Yep, the black ink filled it in. I'll take some photographs later today of the screen frame taped and my first ever print and upload them for you to see. Just remember, I'm new at this, LOL!
Tuesday, September 26, 2006
Okay, common sense won out...
I decided since this is the first time I've ever create a silkscreened print, I better follow all the instructions to the letter. So, therefore, I went back and brushed on screen filler to the remaining areas of the screen frame on both sides. I left a 1" border around the frame as this does need to be taped off. Taping this off assists with the screen not getting stretched out of shape, which is difficult to happen unless you aren't doing something right. It is a squeegee for christ's sake that runs smoothly over the silk screen. At least, I managed to also "patch" my holes that weren't sealed in the process.
I'm excited now... being so close to being able to try my first print. It sucks not having the tape. Don's off tomorrow so we're gonna have to rectify that and he will be here to help/assist. Wish me the best of luck: I'd love to get a great impression on the first try!
I'm excited now... being so close to being able to try my first print. It sucks not having the tape. Don's off tomorrow so we're gonna have to rectify that and he will be here to help/assist. Wish me the best of luck: I'd love to get a great impression on the first try!
Making progress...
I just sealed the reverse side of the silkscreen an hour or so ago. By holding it up to the light, I can see a few areas that I definately will need to touch up so the ink doesn't seep through where it isn't desired.
I also went on a search and believe it or not, I don't have any tape that can used to seal my screen. Darn it, I even looked at it while at Dick Blick's... hhmmm, now I am wondering how duct tape would work, LOL! That is Don's mom's cure-all! I may try it... but again, I'd have to purchase a roll. My only worry is that I don't want to ruin my screen. Hmmm, maybe I should just use the screen filler and fill it all after all. Decisions, decisions.....
I also went on a search and believe it or not, I don't have any tape that can used to seal my screen. Darn it, I even looked at it while at Dick Blick's... hhmmm, now I am wondering how duct tape would work, LOL! That is Don's mom's cure-all! I may try it... but again, I'd have to purchase a roll. My only worry is that I don't want to ruin my screen. Hmmm, maybe I should just use the screen filler and fill it all after all. Decisions, decisions.....
Silkscreen...
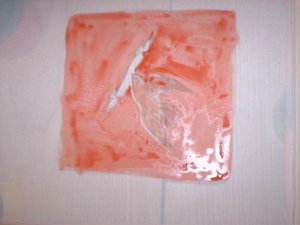 This is the silkscreen in the process of being filled with the screen filler and in various stages of drying. Remember, I am a complete "newbie" to this, LOL! I've decided that after this layer of the screen filler dries on the print side of the screen, I'll flip it over and apply the screen filler to the opposite side. Once it is dried, I'll need to check and be certain that all areas in the screen that I desire not to print are filled or sealed in. The area surrounding the image will be sealed with tape to seal them. This will simply save me on the amount of screen filler required to print this image; therefore saving me $$$ in the end result. I'm so excited about this process; and cannot wait to see the final result.
Ta...Da...
 Here is the design after I used the pencil to transfer, or trace the design onto the silk screen. My image won't have as much detail as you see from the printed image as I will be working with a paintbrush to apply the screen filler in the areas that I desire to remain white and not print, while the areas that I do desire to print will receive the drawing ink. It's a start!!!!
Inbetween...
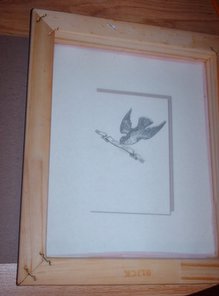 Changing diapers, feeding, cuddling, playing, and laughing with Alexxis, gettting dinner on the table, and the dishes done, I managed to get the silk screenprinting frame prepped by washing it to remove the sizing! Here is my design under the screen ready to be pencilled in onto the screen!
Monday, September 25, 2006
The desire to create and clarifying my own thoughts...
Have you felt like you NEED to create something or all the inspiraiton and ideas that are floating around in that pretty little head of yours would explode with all the possibilities? Well, that pretty sums up what's going on with me today!
I am envisioning all these things that I can screenprint, but there's only one problem, LOL! I've never done this before.... Ok, certainly I have the information required to start, I mean come on how hard is to use a degreaser like Simple Green and soft nylon scrubby to clean a silk screen. From what I've read so far, that is the first step. It done to remove any sizing from the silk because if left in, your ink just may not flow through the screen in places and this prevents that and is supposed to assist with obtaining a clearer image. Then, the screen needs to dry completely. I've read that you can use a hair dryer on low heat to accomplish this. Okay! I can do this.
Next, is finding an image you desire to use. Of course, if you are real good you could draw your own but in my case I've several in my mind and drawing them onto the screen is a completely 'nother story. So, I spent some time online looking for copy-right free images... you know, B&W bold and solid and outline dingbat style of images. From what I am seeing, bold, solid images are excellent for screenprinting. I found some that I desire to use, the only problem is that the grey-scale in the images is going to be hard for me to achieve. Within the screenprinting kit I purchased there are two 4 oz. bottles - one is a screen filler the other is a drawing fluid. {There are two others however they are for use with the photo emulsion style of screenprinting and requires a lot more items than I have available to me at the moment. It is an entirely different method of screenprinting which actually burns the image onto the silkscreen.}
I am planning to do the basic pulling the ink through the squeegee {aka... "ghetto" method, LOL!} From what I am understanding is... once the silk screen is cleaned to remove the sizing, dried, you are ready to begin. Draw your image onto the screen using a pencil. After the drawing is complete, you will have two areas {they are called a positive and a negitive} in the image and it confuses the be-jesus out of me which one is which, LOL! I'm certain that I'll learn that as I get going. For now, I know enough that if I am desiring ink to flow through the screen and onto the paper or fabric to form the image I've drawn on the screen, I place the drawing fluid there. For the areas of the image that I desire not to print, I use the screen filler. The drawing fluid draws the ink into the screen, while the screen filler masks areas. Got it!
I mentioned before, I am a beginnner at all this, and you have to realize that your talking to a paper arts mixed media artist here so my mind interpretes things in a way that I can understand them. Therefore, it would seem to me, that once the screen has the image drawn on it, if I marked a small "X" inside the image in the areas that the screen filler is to be used, it would assist me greatly. I also believe it would be easier, for me anyways --- the beginner, LOL! to fill the screen with the screen filler first. From what I read in the instructional manual, the screen filler is used full strength and is applied to the screen using a paintbrushto both sides of the screen. Check. {a paintbrush was included in my Speedball kit. It is a long bristle round brush --- other than that info you are on your own, sorry. That is all the information there is. No type of brush, although it appears to be nylon... and no size given.} I believe that I'll start on the inside of the screen within the image, then move to applying it to the outside surrounding areas of the image and wait for that to dry. Once that is done, you flip the screen over and apply the screen filler to the reverse side. Okay.
Now comes some more info.... when you working on the silk screen within the screen frame, the screen frame and the silk screen contain within the center of the frame has to be raised on all four corners or tilted when applying the screen filler and during the drying process. Kinda makes sense since if it is laying flat wouldn't the screen filler absorb throught the screen and onto whatever surface your working on? and wouldn't that result in the possibility of some areas of the screen not being filled? Kind of defeats the purpose of the screen filler... to fill the screen, huh?! {grin! Hey, I learned something!}
Moving on....... once the inside area of the screen frame is sealed in all the desired areas, {this is known as "the printing area" says Don}, the screen is flipped over the process repeated on the reverse side of the screen. I've also read and Don has mentioned that you can hold the screen up to the light and see any areas that you desired to be filled that didn't fill with the screen filler. Anyways, apply the screen filler to the reverse side and allow it to dry. Once dry, you are on your way to creating your first print!!!! {At least, when I get to this step, I will be anyways!}
My screen is prepared. {Not in reality, bu in my thought processes...} From here, I have mixed my extender base with the water-soluble black screenprinting ink in the 1:1 ratio {meaning one ounce each}. I read this makes the fabric ink suitable for printing on to paper. {I'll discuss the types of paper to use later and share some of my experiments here, probably in another post.} After this step is completed, my ink is set to go.
Are you still with me? LOL! Okay, my silk screen in the frame is ready, my ink is ready, and now, finally, I'm ready to create my first print. {Remember, I am clarifying this in my mind... so I can sort of figure this all out, LOL!} I apply the ink, Don says it doesn't take much... {Hmmm, what does that really mean? A half teaspoon... teaspoon... a half a tablespoon? He will be assisting me here. I'll let you know when I have that answer!} Anyways, whatever the amount of ink is, it is applied to the edge nearest to me. I take the squeegee and position it at an angle {30 degrees? 45 degrees?} away from me, with the screen raise --- elavated --- up off of the paper I'm intending to print upon, and puch the ink up over my design and into the screen filled areas. This step is known as a "Flood" or "Flood print or a Flood Stroke". It applies the ink into the screen opening of the design you are desiring to print. The next step is the actual "Print" or "Print Stroke". The screen is now lowered, level onto the paper, the squeegee is repositioned to the opposite side of the ink by lifting it up and over the ink you just moved in the flood stoke and again angled and ready to be pulled towards you. Once completed, the ink moves back over the ink in the silk screen, it adds to the ink previously added to the silk screen during the flood stoke, and pushes it out onto your paper. {At least in my mind anyways!} The screen frame is then lifted, the printed paper removed and hung to dry. TA. DA.
What is the purpose of all of this? The main thing that attracts me to this entire process, is that once a design is imprinted/designed within the screen frame, it is usable over and over as long as you check the screen to be certain that the screen is filled where it needs to be filled. This process allows you to reuse and reuse the screen over and over and over again! Now that is what attracts me! It is like a stamp..... only a printmaking technique! It is usuable on both paper and fabric. My mind races with all the possibilities of it! Cards, bookmarks, stationery and fabrics! T-shirts, tote bags, blue jeans....... Mixing , blending LOL! Okay, maybe not as cool as owning your own letterpress, but Hey! it isn't as expensive either!
Paper Types:
From what I have read, most papers can be used with this process. Okay. Now come on, as I paper arts artist, my common sense says, "Yeah right!" So, let me clarify this a little bit. "The Speedball Instructional Manual" says, #20 weight cardstock is acceptable and anything above. I would suggest avoiding any coated cardstock and glossy papers. My mind tells me the ink should be absorbed into the fibers of the paper and allow to dry. Therefore, I will be experimenting using a variety of papers... hmmm, cardstock and watercolored. {I looked at Dick Blick's and somehow missed seeing any printmaking types of paper and by then my art budget was already screaming so I left without it; although I am certain that the Arches and Rives would be a pefect paper to play upon.}
So, there you have, my thoughts, my comprehension, my understanding....... and all that from a beginninger. {Keep in mind, I have yet to do this....} but when I do, I'll be more than happy to share my results with you!
I am envisioning all these things that I can screenprint, but there's only one problem, LOL! I've never done this before.... Ok, certainly I have the information required to start, I mean come on how hard is to use a degreaser like Simple Green and soft nylon scrubby to clean a silk screen. From what I've read so far, that is the first step. It done to remove any sizing from the silk because if left in, your ink just may not flow through the screen in places and this prevents that and is supposed to assist with obtaining a clearer image. Then, the screen needs to dry completely. I've read that you can use a hair dryer on low heat to accomplish this. Okay! I can do this.
Next, is finding an image you desire to use. Of course, if you are real good you could draw your own but in my case I've several in my mind and drawing them onto the screen is a completely 'nother story. So, I spent some time online looking for copy-right free images... you know, B&W bold and solid and outline dingbat style of images. From what I am seeing, bold, solid images are excellent for screenprinting. I found some that I desire to use, the only problem is that the grey-scale in the images is going to be hard for me to achieve. Within the screenprinting kit I purchased there are two 4 oz. bottles - one is a screen filler the other is a drawing fluid. {There are two others however they are for use with the photo emulsion style of screenprinting and requires a lot more items than I have available to me at the moment. It is an entirely different method of screenprinting which actually burns the image onto the silkscreen.}
I am planning to do the basic pulling the ink through the squeegee {aka... "ghetto" method, LOL!} From what I am understanding is... once the silk screen is cleaned to remove the sizing, dried, you are ready to begin. Draw your image onto the screen using a pencil. After the drawing is complete, you will have two areas {they are called a positive and a negitive} in the image and it confuses the be-jesus out of me which one is which, LOL! I'm certain that I'll learn that as I get going. For now, I know enough that if I am desiring ink to flow through the screen and onto the paper or fabric to form the image I've drawn on the screen, I place the drawing fluid there. For the areas of the image that I desire not to print, I use the screen filler. The drawing fluid draws the ink into the screen, while the screen filler masks areas. Got it!
I mentioned before, I am a beginnner at all this, and you have to realize that your talking to a paper arts mixed media artist here so my mind interpretes things in a way that I can understand them. Therefore, it would seem to me, that once the screen has the image drawn on it, if I marked a small "X" inside the image in the areas that the screen filler is to be used, it would assist me greatly. I also believe it would be easier, for me anyways --- the beginner, LOL! to fill the screen with the screen filler first. From what I read in the instructional manual, the screen filler is used full strength and is applied to the screen using a paintbrushto both sides of the screen. Check. {a paintbrush was included in my Speedball kit. It is a long bristle round brush --- other than that info you are on your own, sorry. That is all the information there is. No type of brush, although it appears to be nylon... and no size given.} I believe that I'll start on the inside of the screen within the image, then move to applying it to the outside surrounding areas of the image and wait for that to dry. Once that is done, you flip the screen over and apply the screen filler to the reverse side. Okay.
Now comes some more info.... when you working on the silk screen within the screen frame, the screen frame and the silk screen contain within the center of the frame has to be raised on all four corners or tilted when applying the screen filler and during the drying process. Kinda makes sense since if it is laying flat wouldn't the screen filler absorb throught the screen and onto whatever surface your working on? and wouldn't that result in the possibility of some areas of the screen not being filled? Kind of defeats the purpose of the screen filler... to fill the screen, huh?! {grin! Hey, I learned something!}
Moving on....... once the inside area of the screen frame is sealed in all the desired areas, {this is known as "the printing area" says Don}, the screen is flipped over the process repeated on the reverse side of the screen. I've also read and Don has mentioned that you can hold the screen up to the light and see any areas that you desired to be filled that didn't fill with the screen filler. Anyways, apply the screen filler to the reverse side and allow it to dry. Once dry, you are on your way to creating your first print!!!! {At least, when I get to this step, I will be anyways!}
My screen is prepared. {Not in reality, bu in my thought processes...} From here, I have mixed my extender base with the water-soluble black screenprinting ink in the 1:1 ratio {meaning one ounce each}. I read this makes the fabric ink suitable for printing on to paper. {I'll discuss the types of paper to use later and share some of my experiments here, probably in another post.} After this step is completed, my ink is set to go.
Are you still with me? LOL! Okay, my silk screen in the frame is ready, my ink is ready, and now, finally, I'm ready to create my first print. {Remember, I am clarifying this in my mind... so I can sort of figure this all out, LOL!} I apply the ink, Don says it doesn't take much... {Hmmm, what does that really mean? A half teaspoon... teaspoon... a half a tablespoon? He will be assisting me here. I'll let you know when I have that answer!} Anyways, whatever the amount of ink is, it is applied to the edge nearest to me. I take the squeegee and position it at an angle {30 degrees? 45 degrees?} away from me, with the screen raise --- elavated --- up off of the paper I'm intending to print upon, and puch the ink up over my design and into the screen filled areas. This step is known as a "Flood" or "Flood print or a Flood Stroke". It applies the ink into the screen opening of the design you are desiring to print. The next step is the actual "Print" or "Print Stroke". The screen is now lowered, level onto the paper, the squeegee is repositioned to the opposite side of the ink by lifting it up and over the ink you just moved in the flood stoke and again angled and ready to be pulled towards you. Once completed, the ink moves back over the ink in the silk screen, it adds to the ink previously added to the silk screen during the flood stoke, and pushes it out onto your paper. {At least in my mind anyways!} The screen frame is then lifted, the printed paper removed and hung to dry. TA. DA.
What is the purpose of all of this? The main thing that attracts me to this entire process, is that once a design is imprinted/designed within the screen frame, it is usable over and over as long as you check the screen to be certain that the screen is filled where it needs to be filled. This process allows you to reuse and reuse the screen over and over and over again! Now that is what attracts me! It is like a stamp..... only a printmaking technique! It is usuable on both paper and fabric. My mind races with all the possibilities of it! Cards, bookmarks, stationery and fabrics! T-shirts, tote bags, blue jeans....... Mixing , blending LOL! Okay, maybe not as cool as owning your own letterpress, but Hey! it isn't as expensive either!
Paper Types:
From what I have read, most papers can be used with this process. Okay. Now come on, as I paper arts artist, my common sense says, "Yeah right!" So, let me clarify this a little bit. "The Speedball Instructional Manual" says, #20 weight cardstock is acceptable and anything above. I would suggest avoiding any coated cardstock and glossy papers. My mind tells me the ink should be absorbed into the fibers of the paper and allow to dry. Therefore, I will be experimenting using a variety of papers... hmmm, cardstock and watercolored. {I looked at Dick Blick's and somehow missed seeing any printmaking types of paper and by then my art budget was already screaming so I left without it; although I am certain that the Arches and Rives would be a pefect paper to play upon.}
So, there you have, my thoughts, my comprehension, my understanding....... and all that from a beginninger. {Keep in mind, I have yet to do this....} but when I do, I'll be more than happy to share my results with you!
Our Sunday, continued....
Okay, I can't leave you hanging.... I know you are wondering what did she purchase now, LOL! I found some of the most amazing Cavallini papers! I've admired these papers online and drooled on my keyboard so many times upon spying these, but to see them up close and personal was a paper artists dream come true! Displayed on one of the most beautiful paper racks I've ever seen and filled to overflowing with beauty, I was quickly making some of my selections. Two of this design, one of that, another one of these.......... well, you get the picture! All in all, I believe I purchased 5 or 6 sheets; perfect for my journal bookmaking and Christmas gift ideas!
From there, we headed, okay, Don followed me over to the screenprinting aisle. There we browsed, read product labels, asked questions to the sales associates. I purchase one yard of silk screenprinting fabric, a framed 8x10 screen, a smaller squeegee, and a jar of the Transparent Extender Base. I read online that if you mixed it in a 1:1 ratio with the water-based inks that it is suitable for paper and it assists with extending your inks, increases the viscosity of the ink, the smoothness of the print pull, and prevents your inks from drying in the silk screen while working.
Please note, that I am not a professional at this, just an interested artist who is learning, exploring, and experimenting. I'll be happy to share my results, answer what questions I can, but be warned, I'm learning! I've found in the majority of my artwork that the best way to learn is to read, research, and experiment. You'll discover more as you work and continue to understand what you've read and learn all the little tips and tricks along the way. It is a process, a small part of a long and hopefully, enjoyable journey!
From there, we headed, okay, Don followed me over to the screenprinting aisle. There we browsed, read product labels, asked questions to the sales associates. I purchase one yard of silk screenprinting fabric, a framed 8x10 screen, a smaller squeegee, and a jar of the Transparent Extender Base. I read online that if you mixed it in a 1:1 ratio with the water-based inks that it is suitable for paper and it assists with extending your inks, increases the viscosity of the ink, the smoothness of the print pull, and prevents your inks from drying in the silk screen while working.
Please note, that I am not a professional at this, just an interested artist who is learning, exploring, and experimenting. I'll be happy to share my results, answer what questions I can, but be warned, I'm learning! I've found in the majority of my artwork that the best way to learn is to read, research, and experiment. You'll discover more as you work and continue to understand what you've read and learn all the little tips and tricks along the way. It is a process, a small part of a long and hopefully, enjoyable journey!
Subscribe to:
Posts (Atom)