I worked Friday on creating the Postage stamp ATC swap and 3 ATC's for a personal swap the swap hostess . I am happy to say that all are done and I am extremely happy with the way they turned out. My late afternoon and early evening was spent resting. I actually managed to slip in a nap! A long nap... {sigh... it was heavenly!} After Don returned home from work late in the evening, we headed up to the Moose Family Center for a while and listened to a band. It was great to get out and mingle for a while.
Today, I seemed to have hit the ground running. Amber and Chris came over to borrow a few of my studio tables for a yard sale that they and Chris' parents are having Saturday and Sunday. I quickly checked my email and got to work on computer maintainance and my housework.
I cleaned 80% of our bedroom; still need to tackle our closet as the seasons here in Ohio are changing; managed to do several loads of laundry, then started to work on re-arranging our living room.
After picking up, dusting , vacuaming, and moving a few pieces of furniture, I got the bright idea to start painting. I mentioned before about how I thought about painting only the bottom sections of our walls and adding in a chair rail, so that is what I started. Only to run into a problem with the paint I had purchased. It wasn't at all the color that I had choosen... For some reason it went on the wall in a yellow-orange color vs. the harvest gold I'd picked out. One coat on one wall and I knew that there was no way I could live with it!
A quick telephone call to Don, with me totally freaking out! and one look at it when he arrived home, we decided to headed out to Lowes. Once there, I looked for a while and decided to unexpectly go with an entirely different color. I choose a Pine green/ deep hunter green color.
As soon as we returned home, I was opening up the paint and painting away. I finished up a couple hours ago and I gotta say that I love it! I am so excited about purchasing the baseboard, that we will stain ourselves and install, and later on the chair rails that I will paint white. I decided to stay with the white on them as the window and door trim is already white. I just think it will flow better within the space. I'll have to upload some photographs of our living room soon. Right now, I'm too tired, lol!
I still have painting in the kitchen to finish and since I love the hunter green color so well, I'm considering painting the side walls in the red and the back wall and door in the hunter. I'm thinking the dark green will add a beautiful contrast to the red and pull the rooms together for a more cohesive look. But that, my friends, is a project for another day! This girl is beat! {and trying her damnest to stay awake! I want to run out to Wal-Mart at midnight in the hopes of snagging up a T.M.X. Elmo for Alexxis for Christmas. Normally, I don't worry about what is hot or the current trend but that thing is adorable. It matches Alexxis' happy go lucky personality to a "T". I can see her in my mind's eye, laughing her little belly laugh at it! Wish me luck!!!}
Saturday, September 30, 2006


Friday, September 29, 2006
I forgot to mention....
{Geesh, is that my theme today? I forgot...lol!} The screen is simply washed out after the desired number of prints are created. You can make as many prints as you'd like, up into the hundreds, by applying more ink when needed. My instructional book mentioned using cold and hot water and I couldn't remember which, so I simply used a luke-water about room temperature and it worked fine. Just set the screen aside to dry and it is ready to go the next time you are --- just hold it up to the light and look for any areas that may need to be filled with the screen filler once again. My screen appears to be in good shape. Rinse your squeegee after returning any leftover ink back to the jars and seal them.
If I do decide to create several prints from one or more screens at a time, I'm going to have to create me some sort of "clothesline" to hang the prints up to dry. I've seen clothespin and bulldog clips used to hang them. HTH's anyone who may be interested..........
If I do decide to create several prints from one or more screens at a time, I'm going to have to create me some sort of "clothesline" to hang the prints up to dry. I've seen clothespin and bulldog clips used to hang them. HTH's anyone who may be interested..........
The "Good News" about my screenprinting...
is that all is not lost! I can go back into the screen and fill in some of the areas, such as the inside of the banner and a few other areas that my ink seeped through, however lightly, and refill it. Once it is dry and checked once again, the drawing ink is applied before my flood and print strokes are made.
Oh, and the ink itself, is water-based, and not exactly like the ink a rubberstamper is used to which is more fluid-y and thinner in nature. It is thicker in consistency, comparable to the Golden's Fluid Acrylics in consistency with a touch of gel characteristics. I had to ask Don if it was supposed to be like this, lol. Once mixed with the extender base in a 1:1 ratio, it is ready to be applied to the screen.
As I mentioned before it takes very little. Don applied mine to the screen for me and I was even amazed. He put on a bit more than we need but it can be returned to the bottle afterwards by gently scrapping the squeegee so there is little waste. As far as an amount goes, remember I used a 8x10 frame, so I'd say about a 1/2 teaspoon is plenty. We used a plastic disposable spoon, but from some experience with painting, next time I want to try using a palette knife to spread it across the bottom of the screen the length of my squeegee. Just remember if you try this, the flood stroke is made while the screen is lifted off the object your printed onto, then lowered prior to making the print stroke. It is truly easy!
Also, if you are a mixed media artist who'd like to try this without too much expense, I saw a tutorial on a live journal blog by craftgrrl who used silk screen and embroidery hoop and modge podge to fill the fill the masked areas. It worked great! Here is a link: www.livejournal.com/community/craftgrrl/3674467.html Of course, you'll need the black screen printing ink and possibly the base extender. Enjoy!
Oh, and the ink itself, is water-based, and not exactly like the ink a rubberstamper is used to which is more fluid-y and thinner in nature. It is thicker in consistency, comparable to the Golden's Fluid Acrylics in consistency with a touch of gel characteristics. I had to ask Don if it was supposed to be like this, lol. Once mixed with the extender base in a 1:1 ratio, it is ready to be applied to the screen.
As I mentioned before it takes very little. Don applied mine to the screen for me and I was even amazed. He put on a bit more than we need but it can be returned to the bottle afterwards by gently scrapping the squeegee so there is little waste. As far as an amount goes, remember I used a 8x10 frame, so I'd say about a 1/2 teaspoon is plenty. We used a plastic disposable spoon, but from some experience with painting, next time I want to try using a palette knife to spread it across the bottom of the screen the length of my squeegee. Just remember if you try this, the flood stroke is made while the screen is lifted off the object your printed onto, then lowered prior to making the print stroke. It is truly easy!
Also, if you are a mixed media artist who'd like to try this without too much expense, I saw a tutorial on a live journal blog by craftgrrl who used silk screen and embroidery hoop and modge podge to fill the fill the masked areas. It worked great! Here is a link: www.livejournal.com/community/craftgrrl/3674467.html Of course, you'll need the black screen printing ink and possibly the base extender. Enjoy!
And my first print...
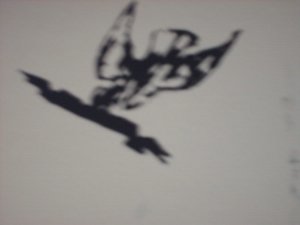 This is my first ever silk screen print! I made a couple mistakes with this but the good news is it can be rectified on the silk screen frame and hopefully my subsequent prints will be a bit better. First, I forgot {there is that word again!} to fill the inside of my banner with screen filler to leave only a small outline of it. Therefore, it printed out black, lol! The second mistake that I made was in my haste to create my first print, I forgot completely about adding in the drawing ink. {Supposedly it assists with the flow of the ink through the screen.}
I'm certain that if I keep with it that I'll continue to improve, like anything else that anyone does --- practice makes perfect! I am a bit envious of some of the silkscreen printing that I've seen, some artists are getting some very fine details within their artwork. Also, I am not aware of anyone that teaches classes in my area, I'd so love to take a few! Maybe, one day I will.


Where is my mind?...
I managed to get the bases for my Postage swap ATC's cut out. Whhooo! Huge step in the right direction, Ha. Ha. But anyways, I do like them. I did something a little different and since a few of the ladies in this swap also read my blog on occassion, I've decided to keep it a secret until the swap has been received.
Anyways, I made one trip out to the studio to gather up some additional items I need and forgot to grab up a sheet of parchment paper and the actual postage stamps for the collage I have in mind to create, so I set aside the rubber stamps, inks, ep's and various items I'll be using. Urghhh.
But thinking about this swap also reminded me that I have a one on one swap with the hostess for 3 ATC's: 1 Halloween and 2 whatever we conjure up without any specific theme. So, I started on the Halloween themed one and while the glue was drying, moved on to cutting out all my lovely bats for a Halloween themed garland and a window decoration.
Somehow, the other day when I went to the studio to get the necessary black and orange cardstock for that project, I forgot to grab my CM oval cutters. So, I made another trip out and forgot to grab the parchment paper and the postal stamps again! Maybe it was a good thing as I needed to be focusing on other things in our home besides creating.
Anyways, I made one trip out to the studio to gather up some additional items I need and forgot to grab up a sheet of parchment paper and the actual postage stamps for the collage I have in mind to create, so I set aside the rubber stamps, inks, ep's and various items I'll be using. Urghhh.
But thinking about this swap also reminded me that I have a one on one swap with the hostess for 3 ATC's: 1 Halloween and 2 whatever we conjure up without any specific theme. So, I started on the Halloween themed one and while the glue was drying, moved on to cutting out all my lovely bats for a Halloween themed garland and a window decoration.
Somehow, the other day when I went to the studio to get the necessary black and orange cardstock for that project, I forgot to grab my CM oval cutters. So, I made another trip out and forgot to grab the parchment paper and the postal stamps again! Maybe it was a good thing as I needed to be focusing on other things in our home besides creating.
Subscribe to:
Posts (Atom)