Friday, June 30, 2006

Grammie's little girl......


I gave up my studio time today, so I could enjoy some of this... Isn't she just precious? Alexxis at 2 months.. sleeping peacefully after her bath.

It was sort of funny, that Alexxis doesn't like a bath yet. The safety first bathtub with it's safety net just quite isn't the same as getting to the point where you really enjoy water. Alexxis wasn't too happy with grammie afterwards, but no worries! She got me back when she pead all over me while drying her off, LOL!

Fanciful Art Banners...

Oh, oh, oh..... I forgot to mention that I found the Jul/August issue of Somerset Studio at Joann's yesterday! I couldn't believe it as I didn't think it would be out until the 1st of July! Anyways, after creating the previously posted artwork, I sat and read, absorbed, and digested this issue. It just totally amazes me the talent that so many people have. How one artist can interprete a call for a submission so differently from another and the choice of mixed media materials each chooses. I sat an read that issue once, looking at all the eye candy! As I turned page after page, I felt my heart sink when I reached the end of the mag where all the instructional how-to's are and the advertisements. I felt my heart scream, "No, I'm not ready for it to be over! LOL!" Have you every felt that feeling? Not wanting the experience to end so quickly, I went back through it and re-read everything.

One of my favorite items, besides the Pais theme, was of Pam Garrison's Fanciful Banners. My only wish was that Somerset Studio's would have shown more of them created by various other artists and gotten the page numbers for them right on the cover! {big grin} The issue states that they are located on pg. 86 which is incorrect, they are on pgs. 90-93... who proofreads the mag???? Anyways, they are absolutely gorgeous and I am planning to create one for Alexxis's nursery but one that will grow with her having it not being made in a nursery theme. I like the idea of mixing paper and fabric and I may even use some iron ons or canvas printed papers for mine. You can see more of the fanciful banners created by a variety of other mixed media artists on Pam's blog located at http://pamgarrison.typepad.com You'll need to scroll down just a bit to view them.

I'm also desiring to create a mini one out of scrap paper and fabrics for the doll house which I'm thinking more and more of decorating in a shabby chic Victorian theme. I've still two unfinished furniture pieces to paint and I truly believe that I like the idea of wiring it for electrical lighting. It is a bit expensive to do, but I think one worth doing so Alexxis and I can enjoy it more in the end.

Well, I've rambled on enough for one day.... I need to get to checking my email, checking my favorite message board and a few groups before I get started on my day. I'm desiring to head out to the studio later this afternoon and work on another submission which is a step by step process with it before working on some glass charms to sale. {*ta...ta}

Some art...


After returning from the grocery store, bringing them in, and getting them put away, I spent a little bit of time throwing ball with Chaos. He isn't liking this heat too much and whined once again to get back into the air. Poor guy! I don't know what he'll do when summer gets full blown --- sheeeesshh, it was only in the high 70's today. Anyways, desiring just to be doing something creative, I drew and colored this with Lyra watercolors. I sort of like the way the colors blended and muddied just a bit before I highlighted the flowers and leaves with a pen. Looking a bit plain, I wrote in one my favorite affirmations. {*smile}

Fabric for a quilt...


Our trip consisted of running out to the mall to visit Joann fabrics where I chose these fabrics for the quilt I desire to start making. In all honesty, I've never made a quilt before so I'm thinking I'll simply do a 4 1/2" square, sewing them on a 1/4" seam allowance on all four sides. These fabrics are from the keepsake calico collection and were on sale for $1 off per yard making them $2.99/yd. I chose these colors simply because the were the previous colors in our guest/laudry room before we turned into the nursery for Alexxis and I've no desire to paint in there for at least the next 5 years, LOL! These same fabrics will be 60% off in next week's ad; so I'm thinking I may purchase another two solids in a lilac and a soft blue to mix in to tone the bright green down just a bit more. I purchased a little over 2 yards of it as it was the end of the bolt. I may also try my hand at creating a matching sham and an accent pillow or two. I love their bright, sunshine-y, summer pick me up colors! Anyways, a box of dressmaker stainless steel pins and two spools of lavendar thread later we headed off to do our grocery shopping.

A great day...

After putzing around the house for a bit yesterday, I spent some time out in in the hot tub relaxing, then laid out in the sun. Not too long, about 35-40 minutes tops before Chaos was begging me to go back inside and into the air conditioning. Normally by this time of year, I've already established a great tan just from weeding the watergarden, mowing the lawn, working outside and being on the deck but not this year --- we had a really wet spring! I realized when we were at the beach the other day that I am quite white. Nothing like sand and sun to bring that out, LOL! Anyways, I decided I better work on establishing some of a base tan so that as our time spent outdoors increases, I won't end up with a severe sunburn one day. We definitely need to restock our sunscreen supply as well.

After a quick shower and getting dressed once again, I set out to making dinner. Chopping up vidalia onions, green peppers, and tomatoes to toss together in some Wishbone Italian dressing to chill --- I recalled it making a wonderful summer side dish and a quick salad topper, I put on some water to boil for elbow macaroni and another pot for eggs to boil. While preparing to make macaroni salad, I defrosted some pork chops in the microwave and seasoned them with some Cajun spices, seasoning salt, and touch of garlic powder. Don loves my little homemade conncoction of spices, especially on pork. I finished up the mac salad and set it in the fridge to chill. A hour or so later we dined on a light summer meal before heading out to do some shopping.

Thursday, June 29, 2006

Some creative ideas.....

I sat and thought about some of the items that I like to create and make for a while today. Made a few sketches and considered some content for a few of them before I remembered that before we left on our road trip yesterday Don had brought the sewing machine back from the store. I suddenly remembered that Joann's had sent me a recent email, so I decided to check it out and was surprised to find that the entire month of July their fabric is on sale. Having saved a bit of money from our grocery money this month, I figured I may as well use some of it to stock up on groceries and some of it on some cool new fabrics.

I'd like to create a fabric book for Alexxis. I haven't thought much about the content, whether to do colors, ABC's, or whatever but I think that I'd like to do some embroidered designs on it and maybe some appliques. I'm certain if I allow the idea to brew for a bit something will come to to me...... maybe a personalized fairy tale of something.

I've had an idea for adding to the nursery for some time now and that is to make her a banner for her room personalized with her name. I was happy when I checked out the upcoming issue of Somerset magazine to see some coming out in the July/August issue available on the first. Just a few days away, yeah! I've one idea in mind creating one out of paper, but a fabric one could be sort of fun to do as well. I may have to stock up on some iron-on transfer paper to add some interest and flair. But for now, I'm heading to the studio soon as I have some other projects I need to create. So, until next time.... whatever you're working on...... have fun creating! {smiles}

As our day continued...

We finally found the Moose Lodge and Family Center at Indian Lake! We stopped in, had another couple margaritas {by this time, I'm feeling them, LOL! I'm not a big drinker... just an occasional social one, so 4 in one day was really pushing my limits, LOL!} Don and I sat there looking out over the water, listening to some of our favorite tunes on the jukebox, and chatting away. Of course, he had to make a bit of fun at me since by this time my eyes were glazing over and I had this enormous smile on my face! figuring I should get something else in my belly to absorb some this alcohol I'm so not use to drinking we ordered some mild barbequed wings and blue cheese to dip them in. I don't know what the hell I was thinking but they tasted so good even if the hot sauce sort of amplified the experience. We sat and chatted with one another until early evening and a thunderstorm rolled in. When the lightning started flashing we decided it was probably time to begin on our journey back home. We travelled down some back country roads making our way through Kenton before reaching home around dusk. Chaos, who was put outside to romp and play was excited to see us when we arrived and showered both of us with puppy kisses. It wasn't too long after that we settled into our jammies and decided to hit the hay, both of spent from the day! But a what an amazing day it was!!!!

Indian Lake State Park Beach


As we travelled to the State Park, we also stopped at this beach. I'd confused it with the beach in the actual State Park Campgrounds as the beach I'd swam at or in, LOL! while I was on crutches and recovering from my car accident while we visited when Shawn & Tara camped there a few years ago. It's so hard to believe it has been over 5 years since we'd last been there.

It was quite an overwhelming experience for me at the time, since I had been no weight-bearing on my right leg for over 9 weeks and had my cast removed just a week of so prior to coming here. I so wanted to go for a swim, so Don helped me walk into the water on my crutches until I got out far enough that I could actually swim! He waited where he was until I swam back to him and resumed my position upon those damn things once more. I felt like I had be released from a prison being without them, even if it was only for a breaf period of time. My poor Dr. was shocked when I told him although he agreed it was probably good therapy not only for the calf muscles in my right leg but for my spirit and soul as well. And was he ever right! I loved it although it was a major challenge for me at that time.

Anyways, yesterday, Don and I took a long, leisurely stroll here, enjoying the sunshine, the sound of the waves, and children's laughter as they played in the sand and the water.

Some things I love.......


Sunny days, time spent with Don, traveling, sanding beaches, wading in water...... Don and I took a road trip yesterday with no particular destination in mind... just point the truck in one direction and go.... These make for some of the funnest adventures that we take and yesterday was no exception. We headed out St. Rt. 47 to end up in Bellefountaine, Ohio where we had a delicious lunch at Tumbleweed. We sat outside on the patio with a ice cold Margarita, cold chilled salads, and a wonderful sunny afternoon! We both ordered a steak that would melt in your mouth, it was so yummy! From there we jumped on St. Rt. 33 and headed to Russel's Point and towards Indian Lake. This photograph is one of the small State Park beaches there where we waded in the water, splashed a bit on one another, and laughed to our heart's content. From there we drove over to the State Park to pick up some camping information and yeah! They have hot showers available! Camping sites aren't too outrageous either although they're full for the 4th of July. We won't actually be planning a trip wherever we decide to go until about the middle of July or early part of August and will make reservations before we head out.

Recent thrifty finds.....


Here are few items I discovered on Sunday while Don and I went to the Antique Flea Market. I am so loving this footed oval bowl. I placed the box of $2 ribbon, rick rack, and bias tapes in it for this picture. I also loved the colorful tote bag with all its beautiful flowers. I couldn't resist this little bird when I found him and what a bargain he was when the vendor threw him in free!

Wednesday, June 28, 2006

Soar --- a page for my artist journal....


I worked more with my Lyra Watercolor crayons in the studio yesterday to create this artwork for my artist's journal. I love the soft, transparent quality of this piece, perfect for the lighthearted feeling and mood that I felt while while my muse was with me.

Anyone who knows me well, knows that I love positive affirmations. This one was written by me, just re-affirming within myself that I can achieve whatever my heart desires.

Ah, Wednesday!

Most people consider Wednesday as "hump day" the middle day of the work work before it begins on its downhill slide easing gently into the end of their work week. Around here, it is known as "Don's day off!" LOL!

It is the one day of a week that we try to get out for a road trip, a chance to visit places that we don't have to hurry to get to in the late afternoon on Saturday or anywhere that is closed on Sunday. Sometimes, we use this day just get caught up on things around our house, to rest and relax. I'm hopeful today will be a bit of both, offering us the opportunity to get out and away and yet not so far away that I cannot recruite some of his assistance to help me move somethings back out to the studio. At least all my hard work recently is beginning to pay off, I'll have room to put anything that we move. I was thinking about this a bit yesterday and in reality there isn't too much left considering I won't be making a trip to the attic since it is hot up there. I've decided to save that for an early morning adventure after I discovered my art easel is in the box it came in at the entryway by the bottom of the stairs! I definately love that!

We have several ideas in mind for how to spend the day. One is to find a replacement tire for the riding lawnmower. Trust me, with an acre to mow and the recent rain, we need it. Another thing on our agenda is show shopping. Thankfully, this time it for Don, and not me! I believe I written how I hate shopping for shoes before and why...... my size 5 feet. Other than that, our day is open free to spend enjoying it! So, who really knows where we might end up.

One place that has been beckoning to my soul is a visit to Headland's State Park. Headland's is a nature reserve on the shores of Lake Erie, where there are miles of natural sand dunes. I'd like to pack up our tent, air matress, sheets, blankets, swimsuits, coolers of food and drinks and several days just to be out and away and enjoy nature. I could definately use some time just to relax from the day to day hustle and bustle. Maybe sometime in the upcoming month of July, we will take a few days to go...

I received a telephone call from my sister, Mary, in Texas a few days ago. It seems she's encountered some sort of problem with her computer and after a call for HP support discovered she's fried her hard drive! She's been going to the library with the two girls to check her emails and stay updated with my blog. Her hubby asked her what she wanted to do either buy a new computer or go on vacation, and being the smart girl she is, she choose the vacation, LOL! Every year, they take the girls for a week to Galvenston {sp.?} Can you tell, I'm not a Texan-girl??? Anyways, I believe she made the right decision, get away from the stress, as far away as you can get. Get out and relax, things will look better and brighter when you return. Yep, the problem will still be there, but you definately have a fresh perspective of how to deal with more effectively when you're relaxed. I suggested purchasing an external hard drive, installing a new operating system in it and using USB jump drives to store any and all data on. No more loss of any precious pictures or items she now wishes she had access to. I've decided to talk with my computer guy to see if and what the two of us can do and suggest to her --- after she returns from vacation!

And while on the subject of vacations, I'd love a mini-one, an evening spent on the rear deck, enjoying the sunset and a nice long soak in the swirling waters of the hot tub! A cold chilled glass of Strawberry Zifandel, a bowl of chilled strawberries, and this girl would be in pure bliss! Tomorrow is going to be a busy day for me as I get into the studio once more and get back to work! My mind has been scrambling ideas for one project or another, notes and sketches are drawn up, and I'm itching to get my hands on my supplies. Several things are in the works but more on all of that later... I'm off to greet the day! even if it is a bit later than normal! I hope everyone has a great day and that you find something in it that allows you to relax and find some peace! {*smiles}

Tuesday, June 27, 2006

A story worth sharing...

The Fern and the Bamboo...a garden story..... (not written by me, just posted by me.... :-) )

One day I decided to quit...
I quit my job, my relationship, my spirituality...I wanted to quit my life. I went to the woods to have one last talk with God."God", I said. "Can you give me one good reason not to quit?"

His answer surprised me... "Look aound", He said. "Do you see the fern and the bamboo?" "Yes", I replied.

"When I planted the fern and the bamboo seeds, I took very good care of them. I gave them light. I gave them water. The fern quickly grew from the earth. It's brilliant green covered the floor. Yet nothing came from the bamboo seed. But I did not quit on the bamboo.

In the second year the fern grew more vibrant and plentiful. And again, nothing came from the bamboo seed. But I did not quit on the bamboo." He said.

"In year three there was still nothing from the bamboo seed. But I would not quit.

In year four, again, there was nothing from the bamboo see. I would not quit." He said.

"Then in the fifth year a tiny sprout emerged from the earth. Compared to the fern it was seemingly small and insignificant...But just 6 months later the bamboo rose to over 100 feet tall. It had spent the five years growing roots. Those roots made it strong and gave it what it needed to survive. I would not give any of my creations a challenge it could not handle." He said to me.

"Did you know, my child, that all this time you have been struggling, you have actually been growing roots?"

"I would not quit on the bamboo, and I will never quit on you."

"Don't compare yourself to others." He said. "The bamboo had a different purpose than the fern. Yet they both make the forest beautiful."

"Your time will come", God said to me. "You will rise high"
"How high should I rise?" I asked.

"How high will the bamboo rise?" He asked in return.
"As high as it can?" I questioned
"Yes." He said, "Give me glory by rising as high as you can."

I left the forest and bring back this story. I hope these words can help you see that God will never give up on you. He will never give up on you.

-author unknown-

Just a story I love and can often relate to with growing pains, I like to often think I'm still establing roots. {*smile}

And a word of encouragement....

http://www.dailyom.com/articles/2/2006/3699.html My horoscope for the day. I love the phrase that says, " Allowing your true colors to shine and expressing your feelings freely allows the people you care about to see the real you. Your uncompromising honesty will help you win their long-term trust and, in trust, you will grow in your relationships. Adopting a forthright manner can inspire your friends and family members to confide in you in a similarly earnest fashion. Your honest and open nature will help you achieve a closeness within your relationships today that gladdens your heart." I certainly hope so....... after all we have that inbred sense to simply feel a sense of belonging, at least somewhere within the world.

How ironic...

I receive these daily om's from www.dailyom.com and today's truly is reflective of my mood. You can read it here: http://www.dailyom.com/articles/2006/3783.html
Sir Winston Churchill once said "Everyone stumbles over the truth from time to time, but most people pick themselves up and hurry off as though nothing ever happened."

In fact, I, myself have been know to do just exactly that from time to time. It has a name and it is called "denial."

But for a moment, I'd like you to take a look at the truths that you believe about yourself and others in your lives. Are you the person you desire to be or are you reaching and striving to be the person you know in your heart you can become? What about the people who you associate with? Are they the people you desire them to be? Are they supportive of you, encouraging you onward and upward? Do you find their wrath amusing and funny as long as it aimed towards someone else? Do you realize that you discovered upon this truth either about yourself or someone else to provide you with the opportunity for change and growth? You are going to change and grow, aren't you? Some may answer not now, but the reality is that sooner or later they will actually be forced to. It is actually inevitable in some ways because nothing ever really truly stays the same way.

n my lifetime, I've had a wide variety of friends over the years, some who are tried and true to me who'd walk throught fire to get me if they had to, and others who wouldn't spit on me if myself were on fire. But the choice of who I desire to remain tried and true with is a personal decision and I will only be burnt once. Life is simply to short to surround myself with toxic people, people who only desire to knock me down so that they can stand on my back to make themselves look good. And if anyone believes that such a person wouldn't do that to you, stick around them long enough and discover for yourself what will happen when they've no one else to play victim to them! Lord forbid you should ever stand up for yourself and/or what you believe in, let alone follow your own heart! Try it and see what happens.....

I myself choose to be associated with people who build me up, who will walk in when the world walks out. People who are proud to call me their friend and aren't ashamed to stand up for me when I am not there to defend myself. And speaking of defending myself, the best way is sometimes to know enough when it is time to and when it isn't worth the effort........

some ponderings and a vent....

I recently noticed something that I feel is strange in a way. Ever since I first posted here on my blog and began asking questions regarding the submisisons process on the 2P's stamping site, some of the artist friends that I felt would be there to support me aren't. It sort of disheartening to think that maybe they don't consider me as much of a friend as I considered them.

Personally, I really doubt if I am the only person desiring to move my artwork into this direction but I just really don't understand how someone can sort of pick and choose who they'd like to be supportive of, unless their is some back-biting and gossiping going on behind an artist's back that they are not aware of. I cannot help but wonder if it is where a group of people who believe that anyone who likes or loves their artwork is worth associating with and anyone who doesn't isn't or what the deal really is.

Either way whatever I do decide to do with my artwork is my business and the responsibility of it being accepted or rejected ultimately lies with with the editor of the magazine. I sort of expected rejection from them but my friends? No way. Maybe some are over-reacting to the thread of competition. Let's face it, I myself have seen a lot of examples of rationalizations and paranoid behaviors come out when there is an artist who has made a success out of their artwork. Sometimes I believe that it is illogical often associated with unsubstantiated fears and attacking one artist over another to make them a scapegoat is sort of the norm in a lot of communities. I just didn't expect to be on the receiving end of it so quickly.

Competition is a fact of every occupation, not simply exclusive to one group of people such as artists and I am smart enough to realize that the being judged is sort of the process, but I refuse to be so judged that it becomes so overwhelming that I'll refuse to even compete. Sorry, but it is simply isn't in my nature to quit doing something I so love simply because I may or may not offend another person. This is my life here!

The realization is that there really is a lot of artists who would be successful if only they'd submit their artwork in the first place. I don't buy into the idea that there is a certain allotted spaces for publication and if I happen to occupy one of them another artist won't make it in mentality. Personally, I feel that is pretty absurb. Somerset Studios is a great example of this concept. Why in the world would they go from one Gallery issue a year to two if that was the case? Wouldn't they stop? Wouldn't they simply use the artists on call at their beck and call for their submissions process vs. putting out calls for artwork in the magazines themselves? How would they grow? And does anyone really believe that a magazine of their size would simply stop growing? Not if they are in it for the $$$ they won't. Let's face it, it has to be a profitable business for them to even continue it....... I'm certain if they were losing $$$ continually like with the Expressions magazine they'd simply stop publication of it and work the artwork into another one of their publications. Another thing, what about their advertisers? Let's face it that is where a publication makes the real $$$. Advertising is expensive, especially for a manufacturer of products, it there that real money lies. Getting the materials out into the hands of people who will use them and utilize them to the fullest! And if they can get an artist to submit artwork to them fairly cheaply enough by offering only a compensation of the copy of the magazine the artist is published in and not have to pay them directly compensating them with the big bucks, what do you really believe they are going to to do?

Now, I'm not saying submitting to a magazine doesn't have its perks. As I've mentioned previously when talking about building a resume, writing an artist statement, and creating an artist's bio it is one way to get your name out there and build a foundation from.

I feel artist's struggle enough as it is. They have their own inner critic and demons that they fight daily. Everything from finding the time to create, to not having their artwork turn out as they envisioned it, to desiring the next latest and greatest product to stay competitive that one really does not need so-called friends to put them down, hinder their artist process, tell lies based upon their insecurities and fears, so that one artist will avoid and create excuses for themselves and their artwork. Geesh...... I try to happy about another artist success! You got published, good for you! I celebrate with many in this realm.

And trust me, I am certainly capable of dropping some big names in a variety of specialized areas from scrapbook creators, to rubberstampers, to book artists, and a variety of other art fields to make myself look good. It is a tactic a lot of beginning artists use to get them to where they'd like to be, but it isn't for me. I desire my artwork to speak for itself. And if I offended someone, oh well, get over it, such is life! I'm not above saying, "I'm sorry" if I did something wrong but to simply personally attack me for no obvious reason other than competition isn't going to fend me off. Being an artist to me requires a lot of backbone to begin with, it requires perseverance and a lot of self-discipline and marketing skills. Just because someone has all that doesn't make them a threat to my success in such a way that I'd feel dignified enough to launch a personal attack on them and I hope anyone who is my situation wouldn't either!!!

Be proud of what you've accomplished and don't let anyone take that away from you! I honestly don't intend to.........{*smiles}

While I am on the subject of artist's papers.....

I'd like to talk a bit more about them. There is a wide variety of papers made each with a unique purpose, I'd like to share a bit of what I know about each of them.

Let's first explore watercolor paper. There is a wide variety of mills that create watercolor papers. The are manufactured using a variety of techniques and a even wider variety of coatings. Some are 100& Cotton rag and others are not. Most will be archival and acid-free, created that way either during the internal or external processes previously discussed and determined by the paper mill. Sheet sizes vary as well as whether they are hot-pressed or a cold-pressed paper. One important thing I can tell you, you'll pay more purchasing them by the sheet than you will through some art suppliers buying them in sheets of 10, 25, or even 100.

Besides being available in only sheets, watercolor papers are also available in pads or tablets. Some loose leaf in nature while others are blocks. Blocks are just as the name states, sheets of a pre-cut size are layered one upon another and slightly adhered together on all four corners. You simply slip a butter knife, metal bookbinding spatula, or a palette knife in between the sheets on the sides and gently lift the paper adhered corners to remove a sheet. Some artist's prefer working directly on the pad, but most will remove the individual sheets to work on them one at a time. Another product for watercolor use in watercolor canvases, often available in packs. They provide a distinct watercolor appearane that can only be achieved on canvas. Fun and exciting to play with!

Just like any papers available on the market today, each artist has their own personal preferences for brands and style of watercolor paper. For the artist beginning, I wouldn't suggest purchasing the more expensive sheets for practicing and playing with watercolors. Practice first, vary your techniques, then when you are more comfortable try a more expensive brand. Sampler packs are great, too. They allow you to try a brand using different sheets in a variety of weights and both in a hot-press and cold-press manufacturing process and a lot of different sized are available. Arches offers a variety of sample packs and most are the 11"x15" size, making storage a bit easier for the beginner.

I want to also talk about Yupo... Yupo is a great product for the beginning watercolor artist because it is a translucent, synthetic plastic and is also available in clear. It allows you to simply play with watercolors, experimenting and adding new dimensions to your artwork. Best of all, if you don't like a piece of artwork you create, simply rinse it off. Yupo is reusable, over and over again. Since it is a synthetic plastic, you do have to be careful not to touch the surface of it with your hands as oils from your skin can cause the watercolors to dispurse unevenly. If you do, simply clean the Yupo with a window cleaner and wipe it clean and wait for the surface to completely dry before starting again. Some watercolors contain a staining medium in them, watercolors that do have staining properties will stain Yupo. It won't effect it's playful performance, but show through some areas of transparent watercolors.

What's so special about it? As I've mentioned Yupo is a beginning watercolor artists dream come true! If you do a google search for it you may stumble across a few tutorials using it. One of my favorite techniques is to use the Yupo for a watercolor mono-printing technique. Here's how I do it. I lightly water the surface of Yupo by spraying distilled water onto its slick surface then I add my watercolor in a desired color. I spritz it to spread it out, sometimes use a brush to move it around a bit, then I take a dampened sheet of watercolor paper and lay it over the Yupo and using my hands gently burnish the backside of the watercolor paper. You can create some amazing watercolor monoprints this way. Say that I desire to add more than one color to a sheet, I simply absorb all the watercolor off using as many sheets of waterpaper as I need to remove the watercolors from the Yupo, then rinse and dry the Yupo using a dry soft towel and begin again using my next color of choice. After spritzing and playing with my brush moving the paint around, I take the previously monoprinted paper and lay it down on the new color and burnish once again with my hands. As long as the watercolor paper is slightly dampened, the colors will blend. If I desire more blending, I simply spritz the watercolor paper and sometimes add some gently movement to the paper. Try it! I promise you'll love it! And I'm not too big on watercoloring with paints in the tube! LOL!

Printmaking Papers
Printmaking papers are just as fun and exciting to me. They are again machine-made papers, normally containing cotton rag with a ph neutral for a variety of purposes and uses. The are ideal for printmaking, etching, silkscreen printing and drawing on. Stonehedge and BFK Rives are the ones I'm most familiar with and both are comparable to the weight of approximately a 140 lb. watercolor sheet, it accepts watercolor well, fun to play with inks, pastels, and charcoal drawings upon and a variety of mixed media applications and techniques. Just plain fun stuff!

Oriental Papers
The majority of oriental papers will be manufactured in Japan by traditional Japanese papermakers, however all are not. Look at the information on websites and art supply stores to discover a variety of other manufaturers such a Thialand and others. They will usually state where they are from. Kozo is a popular oriental paper, sort of manilla ivory in color with deckled edges. It has a light linen woven surface texture and is ideal for drawing, bookbinding, charcoal pencil artwork, printmaking, collage, digital imaging and can be ran through laser printers as it will withstand the heat.

Mulberry paper
One of my favorites to add visual interest and texture to artwork! It is archival so it is great for creating scrapbooks and safe for those who desire an acid-free environment. It is a combination of Kozo, mentioned above, and a sulphite that assists in making it very absorbent. In fact, many artist wet it along a crease or use a paintbrush or wet q-tip to draw a free-hand design before tearing it. It really is one the most versatile of the oriental papers and is available in a wide variety of colors. It is amazing stamped upon, drawed upon, printed on, and for use in collage work. Some artists use it along in a variety of colors to create beautiful landscapes.

Sukisku
Sukisku is another amazing paper. Great for calligraphy inks and writing, collage, and Sumi painting.

Masa
Masa is great for drawing on, it has two sides, one smooth and one with a texture, making it a wonderful product for color pencils drawings and artwork, It can be used in printmaking, silkscreening, woodcuts and linocut artwork as well as leterpressing. It also accepts watercolor inks with ease.

Kitakata
Kitakata is printmaker's dream, it is smooth enough for calligraphy, digital printing, woodcuttings. Super strong and has a silk feel to its surface and has deckled edges.

Unryu
Unryu is a combination paper, make of Kozo, manilla, hemp and sulphites it has an off white color and long fibers that are visible in the paper. It is a great all purpose decorative paper for covering bookboards and boxes and very versatile with mixed mediums.

Kinwashi
Kinwashi is made of 90% manilla and contains very thick fibers with a golden reflecting often resembling tinsel. Very strong and works well with airbrushing, sumi-e inks and paintings, silkscreening applications, bookbinding and collage work. It takes color beautifully.

Japan isn't the only papermaking country that specializes in paper. Thialand offers a wide variety as well. There are a variety of paper mills in France, England, Canada, Mexico and in the US, and this isn't even an all inclusive list! Paper is everywhere, available in so many sizes, purposes and uses for it, and and in a variety of weights and coatings. The easiest way that I've found to learn about paper is to request art supply catalogs, contact various mills, request samplers or purchase them and to read about them online. There is such a wide variety of things that you can use paper for, mediums that they will willing accept, and technqiues to learn. Just about anything you can do with fabric you can do with paper except possibly wear it on a rainy day! But more importantly, learn what it is, how it is made, what it contains, how is coated, is it archival, and what mediums it will accept. I promise you, you'll be so happy you did, heck, you may even discover ways to use it that it was never intended for. Anyways, have fun!!!

A Picture of Hollander's School of Book Arts and Paper Arts


I obtained this photograph from Hollander's website located at http://www.hollanders.com Hollander's is one of my favorite places to shop online for artist's papers. In this photograph you can see the free-standing structures used within the store to store the handmade and imported paper in large sheets. In the right lower corner you can see the "A" frame that I discussed in my previous post, and if you look closely you can see the chain that is used to anchor the structure. Beautiful, huh? A book artist's dream......

Storing Artist's Papers

One of the greatest obstacles that I personally have faced in my studio is how to store the larger sheets of artist's paper. For this post, I'm grouping all large sheets as artist's paper regardless of whether it is a watercolor, handmade, large printed sheet, or a speciality imported paper. Do you remember when I stated most sheets are cut by the mill to a 22"x30" size? Well, not all are but the majority will be. Some samplers packs on the market will be half sheets that meausure 11"x15". Japanese or Oriental papers come available in a variety of sizes; some 38" x 25" while others are 24"x36", and to add further insult to injury of how to store them, some are 22" x 30". Some watercolor paper such as the Arches come in a variety of sizes as well, some standard 22"x30; while others are larger and measure 30"x41-42". But one common denominiator they all contain is many artist's struggle with storage.

I'm certain most watercolor artists, book art artists, and basically anyone would love to have either a wood or steel flat file cabinet for storing these papers. I know I most certainly would, however, I simply cannot afford one at the low end of $700.00 and upwards of over $1000.00 and for another reason, I personally wouldn't have the space. Now I am fortunate enough to have obtained a large cabinet that I use to store my bookbinding supplies within my studio. I am able to store large sheets within in laying flat, however most paper artist's won't have been so lucky to as to find something. For those, I'm writing out some storage solutions.

One of the neatest options available today is to create a way to display them within one's studio. I discovered this option while visiting Hollander's in Ann Arbor, MI. Within their store, their papers are displayed for sale by using 1"x3" inexpensive pine board in an 8' lenght. Two boards would be required to make a free-standing structure. Each board is cut in half, creating four 4' boards. Two boards are screwed together at the top while at an 45 degree angle and the bottom of the boards that rest on the floor are cut to maintain level on the floor. Once all 4 boards are formed in this fashion, two board per side, dowel rods were screwed in from the outside of the legs through the side supports and into the end of the dowels. The bottom is spaced approximately 16", maybe 18" up off of the floor and then spaced in 2" or 3" increments up the support. Both sides of the free standing unit were completed in this manner. To prevent the weight of the paper from collapsing the structure, a chain cut to a pre-determined lenght was used along with bolts, nuts, and washers to allow the structure to only open to a certain point. It really looks like a small "A" frame from the side view, with the chain forming the center line across the "A". I'm not certain if I can find a picture to show you, but I can assure you I'll be happy to take one of the one I intend to create. This is one of my dreams to have something of this nature but there are several other options.

Another option is to purchase an Artist's Print Rack. They are available in wood and or a lighter weight aluminium with a heavy nylon canvas. These can be purchased inexpensively enough at the low end of $29.99 up to over $100.00 per rack. Even a smaller table top one can be used to hold artist's paper by using foamboard as a support on front and back sides within the trough to store the papers without damage.

Need something cheaper? Desire to spend your $$$ on art supplies and materials vs. making a huge investment in your studio. Use the mailing tubes your online orders of handmade and imported papers come in for storage. You can purchase them at a lot of container stores and mailing facilities. I used to use this storage until I ran into a problem with moisture from cement block in my own studio. Luckily for me, I discovered the problem early and was able to get all my papers out, laying flat to dry back out and the damage wasn't too extensive since caught early. One of the down sides was each container had to be labelled with the contents inside since you cannot see into them.

Since I had a problem with mine, I had to seek out another storage solution and lucky for me, this is the one I use today and love the most. I took my dried out artist papers, handmade, watercolored, imported, Italian marbled --- well, all of it and gently rolled it. I cut fibers and strings to gently tie them into the rolled position and used metal rimmed tags to label them with the type of paper, where I purchased it, and the price. I purchased a trash can, plastic, lined it with a new trash bag and inserted the rolls into it. It works perfectly for me. I can see what I it is that I desire easily and the tags help me identify each and every sheet. For smaller scraps of these same papers, I used the same technique rolling them up, tying them, and labelled them with the project that I last used them on vs. the type and where purchased. I promise a picture of my inexpensive solution soon! {*smile}

Monday, June 26, 2006

Pamphlet Stitched Book instructions

I couldn't find the link that I originally intended to share with you here on my blog so I decided to write them out for you. Any book can be created using this simple method and I often use standard text weight paper for the interior pages and cardstock folded in half for the covers, although any variety of paper will work with it.

Begin by taking an 8.5"x11" sheet of paper and cutting it in half on the 11" side, making two pages 5.5"x8.5" Determine the desired number of pages, keeping in mind if using this size, you can get two sheets from one sheet. After cutting, fold each of the pieces of text paper in half along the 8.5" side forming a 4 1/4" x 5 1/2 pages. Tuck one sheet inside the of the others, so you create a small booklet.

Cut your cardstock for the covers in the same manner using an 8.5"x11 sheet. Fold the cover just as you did the text pages (it may have to be scored to crease well or can be creased using a bonefolder.) Next, place it on the outside of the text pages, or insert your text pages into it's folded interior.

Open the booklet and on the middle page of the book, along the folded trough, use a pencil to mark three spots. Place a small pencil marked dot in the center of the page, and if you're using 8.5 x 11 paper, place one dot 1.5" from the top of the book (the head) and one dot 1.5" from the bottom (the tail).

Holding the book together firmly by the left hand side, use a pin tack or an awl to pierce holes through all the pages and the cover at the location of each of the dots.

Using a piece of thread or embroidery floss (all 6 strands are fine but I prefer to separate them using only 3 strands) and begin stitching. You'll start on the outside fold of the covers coming in from the outside into the center hole on the inside of the folded crease, leaving a 3" tail on the outside of the pamphlet. From the inside center hole go up to the hole you created 1.5" from the head of the book coming from the inside and working towards the outside covers. From this point go all the way to the 1.5" hole placed from the tail of the pamphlet working from the outside cover to the inside of the folded crease once again. From here, take the thread to the center hole from the inside and bring back out to the outside covers once more. Note: I like to create a small twisting motion capturing the previous threads, so that when I have finished stitching, I have one thread on both sides of the long thread that runs along the outside center of the spine. Now, tie both ends into a simple square knot. Admire your pamphlet stitched book or booklet!

If you have used a paper that is a different size by 8.5 x 11", then adjust the holes that are near the head and the tail, so that they are evenly spaced between the middle hole and the end of the book. You can do this by cutting a small piece of paper the height of the book, folding it in half once, opening it up, and then folding from both the top and the bottom to the center fold you first created. It will evenly space your hole placement every time!

Cathy Highland © 2006

Also, if you decide to use any of these tutorials. Please respect my copyright and include it on any and all documents and printed materials. I don't mind sharing so I tend to create these tutorials using a Creative Commons License. You can find more about it here: http://creativecommons.org/ and happy creating!

Why create books?

Most of us have read books the majority of our lives, but have you ever stopped to consider the uses for them? Daily we use a variety of books...... address books, calendar style books, storybooks read to our children or grandchildren, phone books to look up telephone numbers, books to be read for entertainment, research, how to's and tutorials, as well as learning. We probably even take them for granted somewhat. Books also come in a variety of sizes, styles, and even bindings and each provide a different purpose in our lives. Everything form a brouchure to a pamphlet to a magazine to a bound book is available on the market today.

Anyways, I chose to get into creating handmade books for a variety of reasons. One I desired to learn how to, and secondly, I loved the possiblities they opened up for me using my artwork within them.

Simple brouchures can demonstrate a project or a technique in high stlye. Pamphlets can be visual or textual and offer a variety of purposes. One purpose with the mixed media world of artists is to use them as Friendship books, Gluebooks, and/or a Deco. A deco is a small handmade book usually used in a collaboration with other artists, passed from one artist to another for artwork to be created in it and shared with the remaining participants before being returned to the original created. Normally a theme will be created by the originator for others to follow. Such collaborations are known as round robins in the mixed media and altered book arts world, and circle journals or journeys in the scrapbooking circle, however the result is the same. One difference between a collaboration of this sort and a swap of a certain created item is often in the fact that all the pages are not created identical to the first one, making each a treasure to behold. Artist note: I don't mean to state that all artist swaps are accomplished by creating identical items for each person.... some are and some aren't; it mainly depends upon what the people involved in the swap have decided upon and/or what a swap hostess may propose.

Anyways, getting back on the subject here, I am often asked, "why I create books?" and my answers always vary. I use them for a variety of things so I'll list here, it isnt' meant to be an all-inclusive list, just some food for further thought:

Dairies and personal journals
Visual Journals
Art Journals
Address Books
Artist Portfolios
Collections of written materials such as quotes, poems, and short stories

but the number one reason I create them is simply this: I love creating them, binding them, and decorating within them either before or after their creation!!!! See, that was easily explained. {*big smiles}

Creating a stab bound bookbinding.......

Creating a stab bound book is one of the easiest ways to create a book, at least for me. It is actually an easy book for a beginning bookbinder to learn, although it maybe not the most simplest. {The simplest is probably a single pamphlet folded and bound, but I'll provide you a link to one of those later --- compliments to my dear friend, Suzanne.} but for now, let's discuss some stab bound books.

Stab-bound books are also known as Japanese Stab Bindings. If you do a google search for them, you'll discover an array of examples created with various binding styles. Experimentation is one of the main keys to them. First and foremost, I think I should mention that a Stab-bound books size is one of the most important factor in the pre-determining process, as a variety of sizes can be created, almost with any book really once you learn the basics of bookbinding.

Anyways, I tend to start by creating mini-books while learning then moving on to creating bigger ones after I have mastered the skills. Doing this saves me both time and effort and each are just as precious as the next once completed.

Okay, have you chosen a size of one you'd like to create? Or do you want me to suggest one? LOL! I know some paper artists desire specifics so I'll suggest one here in the event that someone desires to use this as a tutorial to create their first one. Let's make a 3" length x 5" width one.

As with any bookbinding project you'll ever begin, you'll first determine the type of binding, then the size, and then the amount of pages you desire. Some books will include the front and back covers while others will not, but it is really up to you. For those who desire to use my suggestions, let's not include the front or back covers. You will need to cut 2 extra 3"x 5" sheets later for them.

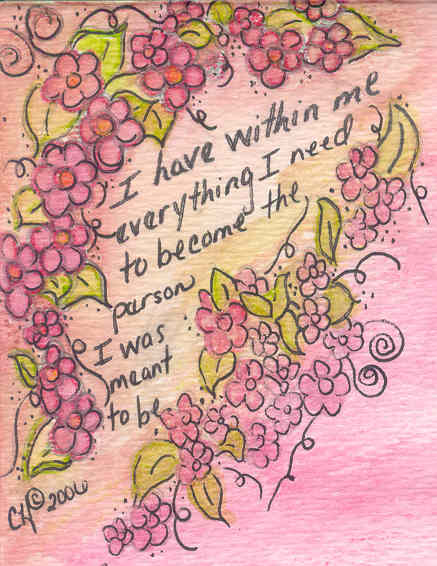
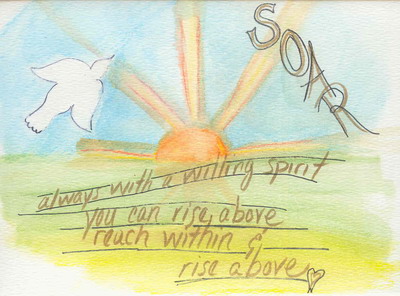
First, I try to determine the purpose of the book.... Do I want to include a poem or illustrate one? If so, I try to break the poem down into smaller more manageable sections or paragraphs. Then, I count so that I will know how many paragraphs will I need? For those of you, my readers who desire a straight tutorial, I'll suggest using this poem. I used it myself in a tag style book I created years ago, and still to day enjoy reading it. Here it is:

As the dawn of each morning peers into your life, there lies a path to follow.

Delicate whispers can be heard if you listen to the sound of your soul.

If you listen closely to your soul, you will become aware of your dreams that are yet to unfold.

You will discover that there lies within you a voice of confidence and strength

that will prompt you to seek and live a dream.

Within the depths of your mind, the purpose and direction of your life

can be determined by listening intently to the knowledge that you already possess.

your heart, mind, and soul are the foundation of your success and happiness.

In the still of each passing moment may you come to understand that you are capable of reaching a higher destiny.

When you come to believe in all that you are and all that you can become there is no cause for doubt.

Believe in you heart, for it offers hope.

Believe in your mind, for it offers direction.

Believe in your soul, for it offers strength.

But, above all else, believe in yourself and your dreams.

The poem is written by Leslie Neilson, and is one of my favorite affirmations. I hope you will find it useful in your life as well as I have in mine. Okay, do you see all the double spacing {or breaks in the poem? I hope it will publish correctly.... anyways, each line should end with either a comma or a period, if that helps, or be separated by a single line.} Next, you'll need to determine if you desire it to be one sided or double-sided. For the tutorial, let's use double sided, since that is the way I designed my tag book and I can more easily follow along with it. By seeing the poem broken down, I can determine that I'll need 8 pages, using one for the artist's credit. If you desire single sided, you'll need 16. Everyone will need two additional sheets of 3"x 5" sheets for the front and back covers, for a total of 10 pages if double-sided and 18 if single sided. Can you envision how I determined that?

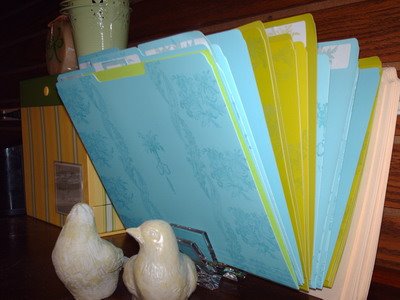
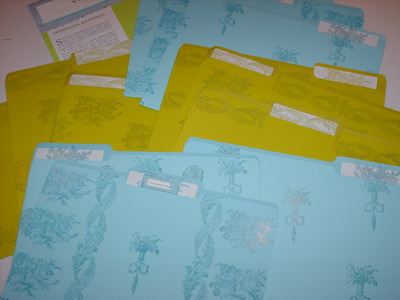
Next, you need cut all the desired number of pages and the two covers. You can make your covers using colored cardstock or whatever you desire to use or make the covers and pages the same. For my tag book, I simply used tags and colored papers for my covers but it is really up to you.

Now, we need to determine the actual binding side. Stab bound books can be created with the binding along the left side or along the top. For the tutorial, let's use the left side and make a margin of 3/4" of an inch. You can either score this margin in or lightly draw it in with pencil. It is important to keep this marginal space clean and free from any artwork or 3D embellishments or they will interfere with binding later. Draw another line lightly in pencil 1/4" to the right of the margin line, you can erase it later, and use this line as a guide for the actual writing of the poem. Your writing should begin along this second line as we'll later bind the book using the 3/4" one. Got it?

Once all your pages are cut to the 3"x5" size, your margins are mark, and your handwriting line is established on each page, begin to write out the poem if you desire to use your handwriting, or copy and past the text into a Word document, arranging it to fit on the pages and print it out. If you print it, you'll need to trim and then paste each line onto each page in the fashion you chose previously {single sided or double-sided} utilizing the number of pages you decided upon. For those following the tutorial, let's write it so I won't waste time with the process of setting up the word document and such. You'll put one line on one side if doing double sided the next line will be on the backside of one page. If doing it singularly, you'll have one line per page. Clear as mud? LOL!

Okay, once the poem is written out, stack the pages beginning from the first line of the poem to the last page which should be the artist, Leslie Neilson. Add your front cover to the stack, then pick the entire stack up and lay it on the back cover and set it aside.

Now, we'll determine the placement of the holes that will be placed on the 3/4" line. In this step, I want to use a scrap piece of paper, any will do, text weight or whatever you have handy. Cut it to a 3" x 1 1/2" size. The 3" should run vertically and the 1 1/2" horizontally across. Use your pencil and determine the 3/4" placement across the top of the 1 1/2" side and make a light mark. Now, fold this in half lengthwise to end up with a 3" x 3/4" sheet. Still with me?

Now we will determine the placement of the holes for the actual binding by unfolding the sheet and re-folding top to bottom on the 3 inches. The first hole will be the middle hole you'll create. Open the fold back up, and pay special attention here. I want you to re-fold the paper first from the top to the line created in the center by the previous fold. Unfold this and repeat this step using the bottom of the paper, bringing it up to the center fold again. Open it up.

At this point, you should have a 3" by 1 1/2" piece of paper with a long vertical fold at the 1" mark on the 3/4" side of the paper. There should be 3 creases in the 3" side of the paper, the first 1/4th of the length, the second at the halfway mark, and the third at the 3/4 section. If you didn't achieve this, start over using another piece of paper. This step is important for the hole placement for binding. Are you ready to move on?

Okay, if did the steps above correctly, I want you to use a hole punch and punch holes where the vertical line of the fold on the 1 1/2" side intersects each of the folds you created in along the 3" side.

You should end up with a piece of paper that contains 3 holes down the center of it at the 3/4" margin we pre-established for the binding with the same positions noted above for the 3" side only centered in the 3/4" trough. If you made it this far, congratulations! Give yourself a pat on the back! We're almost ready for binding.

Now, I want you to use this as a hole placement guide on your actual book pages. You can do this one of two ways, either by individual pages or by the entire project. Let's act professionally and do the entire thing, it is quicker and easier actually. Pick up the book in the same fashion that it was set aside, front cover, all the papes, and lastly the back cover. Tap it on the table along the left side of the 3" side to jig all the pages together. You can place a binding clip on the right side so the pages won't slip while you work to create the holes for the binding process, if you desire. I tend to do this still!

Once you jigged your pages together, knowing that both covers and pages are straight, have your binder clip in place, I want you to use the paper with the hole placement in it as a guide and line it up top and bottom over the left edge of the book structure. In the 3/4' trough that runs from the top of the book to the bottom, I want you to punch a hole all the way through the book in all the preset holes we previously created. Important note: If you used a ruler at this point the holes would be lined up 3/4" in from the left margin of the book from top to bottom at the 3/4" spot, the 1 1/2" and 2 1/4".

Now, we are ready to begin the actual binding process! Many things can be used to bind the book, embroidery floss, ribbon, jute, string, fun stronger fibers.

Before you begin binding any sewn book, you need to determine the length of the binding used. A general rule of thumb to use is.....{drumroll, please.......LOL!} to count the height of the book in inches + the number of holes +1. In our tutorial, we have 3" height + 3 holes +1 which = 7" as you can see, if you've seen a stab bound book, that isn't going to work. Why? that process will only work with a book with two holes!

Another way to be certain you have enough of a binding material, is to wrap the book's length wise 4 times. Well, if our book is 3" it would take 6" to wrap it once. 6" x 4 times = 24" of binding material. Since we've 3 holes the two hole method won't work, so cut your binding material of choice to 24".

Beginning from the back of the book, working with the top hole, thread your binding material up through to the front cover. Be sure to leave about a 3" tail to tie off to at the end of the binding process. Do not knot it now. Bring the binding material up over the front cover towards to top edge of the book cover and back up through the top hole. Your binding material should be on the top of the book coming out of the 3/4" hole. Now, take it off to the left side of the same hole and wrap it down underneath the back cover and bring it up one last time through the same 3/4" hole. Again, you should have your binding material coming up through the top of the book's cover and through the top hole, you should also have at this point a snug loop over the top of the book and over the spine of the book in the top hole. Now, go down the 1 1/2" center hole from the top of the book working towards the bottom and wrapped around the spine, bring the binding material up through this hole from the back of the book to the front once again. You should see two spine wrapped hole at this point, the top and the center. Now, take your binding material down to the bottom and final hole. Go down through it front to back. Once on the back side, bring it back up to the front side of the book and down through the bottom hole again. You should have added a loop over the bottom of the book and are coming out of the 1 1/2" bottom hole. Now, take the binding material once again and bring it out to the left side of the book, up over the front cover and back down through this hole once again coming out the back. You may struggle a bit to get the binding down through the hole again but keep working it. Now, take the binding material you end up with and tie it off centering it with the tail in step one on the backside of the cover. Congratulations! You've just created your first Japanese Stab bound book!!!!

Now, are you ready to experiment with a bigger book? Go right ahead, you know the basics. Feel free to add more holes as long as you create an odd number of them you can use the same binding as above. All the center holes will bind the spine while the top and bottom binds both the top and bottom of the book as well as the spine. Happy creating and bookbinding!

What does all this have to do with creating an Artist's journal?

If you remember my reply in the original thread that started this entire process, I made a comment about desiring to begin an artist's journal but did not desire to be limited by the types of paper available to me. I want to use a variety of papers, some lightweight for drawing and sketching, some heavier for my Golden's fluid acrylics, some watercolor papers for watercolored backgrounds and sketches, and yes, even some vellums! I can simply imagine them being added over a watercolored scene and using a slick writer pen on the vellum as an overlay to journal on.

Since I one day desire to bind this in a book for a finished artist's journal, the items I previously mentioned will assure me a good quality book when the project is completed. I believe one aspect of this is that it will make this a wonderful adventure for me is I won't be limiting myself to the mediums I desire to use and in the ways that I desire to use them. I also think it will add to the visual quality of my artist journal once completed and bound together..... a mix of papers, mediums, and techniques!

Having a pre-determined size of paper to use will assist me greatly as I can create what I want, how I want and still be able to bind it whenever I feel the time is right. I'm almost certain that this won't be the first book the book I'll create this way as I am already loving the idea! But one thing that I will need to consider further is the type of binding because I'll either need to leave a margin of it or create signatures for it. Would you like to discuss some options? Come on, let's go.....

What about the paper's grain?

In my previously post, I briefly touched on the subject of a paper's grain. Those just starting in the paper arts and bookarts, or heck, even those involved in the paper arts and bookarts as a beginner may not fully understand what it is, how it even applies to creating with paper, why it is important, and how you can determine it.

For me personally, I didn't even discover that paper had a grain and why it was important to me until I began in creating books by hand. So, I'll discuss that here for others to learn and discover.

What it paper grain?
Remember the fibers used in the papermaking process that I mentioned in the previous post, the cotton rag and wood pulp used in the papermaking process? The direction of those fibers assist to determine the paper grain which can be one of the most important aspects in acheiving a perfect fold or the desired appearance of a tear within a sheet of paper.

During the process of making paper, the paper grain is the direction that those fibers within a piece of paper are pointed. It will either be toward the long end of the sheet or toward the short side of the sheet as only a few of the fibers will run in the opposite direction and are able to provide any resistance to the folding mechanism. The more fiber a sheet of paper contains the more resistence will be felt when folding and/or tearing and the lower the quality of the fold or the tear.

But, first let's discuss the direction a bit more. Understanding it will increase your understanding when creating with paper where folds are important. Direction of the grain is usually mentioned by three terms: parellel, purpendicular, and diagonal.

  • Parellel - runs in the same direction and do not intersect or cross over one another, in papermaking this is the horizontal range and runs acrossed the shorter side of a standard sheet of paper {the 8 1/2" side},
  • Purpendicular - runs at a right angles to the plane of the horizon; a vertical line or direction, and in papermaking is straight up and down on the long side of a standard sheet of paper {the 11" side},
  • and Diagonally, running across from corner to corner; normally the upper left right corner to to lower left corner although it can be discovered vice versa.

An important note: Very few papers will have a diagonal grain and mostly only those that are created by a handmade paper artist who desire the paper to be so created with a certain purpose in mind such as for orgami.

Why it is important?

Paper that is folded parallel to the grain of the paper will fold much more cleanly, resulting in a crisp, clean, and straight fold. The parallel grain will produce a much cleaner and neater fold because the paper fibers (grain) are running in the same basic direction as the fold.

When a fold is applied perpendicular to the grain of the paper, the resulting fold may have a ragged appearance. Perpendicular grain produces a ragged fold because all of the fibers are folded at one time creating resistance to the folding action. The ragged appearance of the fold is especially noticeable when folding heavier stocks of paper or torn, it will also result in a jagged appearance and the paper will not tear in a nearly straight line.

For handmade paper, the direction of the grain can be found quite easily. Bend the paper gently first lenghtwise, then gently widthwise. The fold that offers the least amount of resistance or is folded more easily will be parallel to the grain of the paper. The paper will also tear more easily when torn parallel to the grain and result in a more even straight tear. For the machine made cold-press and hot-press papers, the grain usually runs perpendicular to the curve of the roll, or parellel to the edge of the paper.

It is important to know this when desiring to create cards books by hand and in bookbinding because you desire for an optimal level of strength to prevent warping. The grain of the paper must be parellel with the spine of a book, and the grain of all the paper must go in the same direction. It is extremely important because as the paper expands when exposed to humidity it will expand perpendicular to the grain. If the grain in the books signatures and/or book block, endpapers, and book boards used for the covers of the book and all the papers used to cover them, are facing the same direction, the expansion will only cause slight curving normally occuring as the glues used in it a book's creation shink the fibers of the papers.

If the grain is not all in the same direction, the expansion will be in multiple directions, causing extreme warping of your card if you're layering in a layer inside for a more polished appearance of in that of a handmade book.

Now that I know what paper grain is, why it is important, how do I determine it?
There are some simple test you can use to determine the paper grain direction and some of the results you'll achieve:

  • the folding test - When you are folding a small sheet of paper you will notice that it folds more easily and smoothly when the fold is parallel to the grain. When it is folded against the grain, or purpendicular to it, the crease will show small fiber particles that are broken or in the process of breaking and the end result will make an unsatisfactory fold, jagged in appearance.
  • the moisture test - moisture is applied to one corner of a sheet of paper by just dampening it. It will immediately start to curl in one direction either up and down or across. The direction of the curl will indicate the paper grain direction.
  • the bending test - I mentioned this one in the section above only with handmade paper and it is the one I use the most often. You simply bend the paper without actually creating the actual folded crease in the paper. Thicker papers are best tested by bending them in both directions and with some more expensive artists papers where you don't desire to create a fold in them. One direction will offer a considerably more noticible resistance than the other. Parallel to the grain direction is discovered where there is the lest amount of resistance against the grain.
  • the tearing test - in this test a sheet of paper is actually torn in either a horizonal or in a vertical direction. The tear pattern will be straight when parallel to the grain and jagged when across the grain. I use this one if I'm creating a collage where I desire a torn edge to begin with.

Once I've established the direction of the paper grain in my larger sheets of paper and before I roll them for storage in my studio, I mark each sheet of paper using a pencil and lightly mark in an double ended arrow which will later indicate the paper grain. This saves me some time later when I pull those paper for use in either cardmaking or bookbinding. I just simply use the bending method for smaller sheets. You'll just have to trust me on this one and try it out for yourself but I can assure you that by determining the direction of the paper's grain, you will be much more happier in your paper art adventures. {*smile and I hope you discovered this information useful in your papercrafting.}

Art Journals, Visual Journaling, and Choosing the right papers

Recently there was a thread on the 2P's stamping board regarding creating Art Journals and Visual Journaling --- you can find the original thread here: http://www.twopeasinabucket.com/mb.asp?cmd=display&thread_id=1827932 {should you desire to read it.}

Anyways, in many ways it got me to thinking about starting yet another art journal for myself. The majority of my life, I've journal in journals and if you read the previous thread you may have read where I stated half of my life is in note written pages, as I work to re-organized my studio, I realized that could not be truer! I've a few piles of loose sheets of paper to go through at some point and time, I'll need to organize them but for now, I'm desiring to begin a new art journal for myself.

One of the drawbacks is that I love to create in a variety of mediums, so the paper that I choose definately is affected by the medium of choice at any givin' time. I don't like to pre-establish anything that will limit the medium that I desire to create in so I thought maybe I should write up something that others may find useful about what affects my decision making process of which papers to use.

First and foremost, is the medium that I choose to use... whether it is a colored pencil drawing, acrylic paint, watercolors, the paper itself or a technique I desire to create greatly affects my choice. Other factors that determine the base upon which I work is whether the paper itself, how it is manufactured and produced, and whether it is handmade {by me or others or even purchased}, mould-made, or machine-made. Understanding each of the process of papermaking assists me greatly and it should you as well. If you are already a paper arts artist, crafter, or whatever you desire to title yourself, you have probably already decided upon a paper to use at some point whether you made that decision unconsciously or consciously, but regardless, here are some interesting points to make note of. For me is just as exciting as creating upon its surface! Let's do some exploring of the different types of papers.....

  • Handmade papers - usually available in both large and small sheets and normally created by highly skilled craftsmen or handmade paper artists using natural or speciality fibers, particularly cotton and/or linen flax and various other materials that are used to impart a special characteristic to the paper. Most handmade papers have an often irregular surface that many find appealing to their artwork. Inclusions may be added and often consist of dried floral petals and a variety of greenery, seeds, torn newspaper print, glitter, and tinsel as well as a variety of other flat objects. Although the handmade papers can be a bit more expensive they are usually some of the most beautiful sheets you'll ever see.

  • Mould-made papers - have a random distribution and often a thicker arrangement of fibers but are moulded using a high speed cylinder mould machines that stimulate the appearance of the handmade paper process. Generally, these sheets are more durable under intense use.

  • Machine-made papers - have a surface texture that is more mechanical in nature than the handmade or mould-made and are normally less durable. They make great papers to draw and sketch on due to their smooth regular textures but do not make the mistake that these will have the same durability or appearance and feel of the handmade or mould-made papers.

Several factors that effect papers, especially the machine-made ones are the ingredients used to create the papers themselves. Two common ingredients are cotton rag and wood-pulp so I'll discuss both of them.

Cotton rag is normally made using the longest fibers and some of the highest quality fibers. Some of these paper can last up to a hundred years and can generally handle intense use. Heavy erasing and re-working show minimal signs of wear and tear upon their surfaces and the cotton used in this process is normally torn or beaten into indivudual fibers within a vat and by beaters to create a thick consistency of the pulp used to create and mould this paper.

Another ingredient is cellulose, a wood pulp, that produces a lesser quality of paper than the cotton rag does. Containing wood pulp creates yet another factor to consider for the paper artist as it contains a high-acid content of paper on the ph scale that will eventually effect the paper breaking it down over time. The yellowing that you see in newspaper print or in construction paper is a great example. It is a result of the acidity of the wood pulp. Lignin contained within the wood pulp also plays a role in the acidity of the paper yet tends to add some strength to the process of papermaking. The good news is that buffers, such as calcium-bicarbonate, can be added to the process to produce an acid-free cellulose paper like many of the acid-free printed papers and cardstocks available today.

Other papers offer a mixture of the two, cotton rag and wood-pulp in pre-determined amounts. It simply depends upon the paper mill and the proces and type of paper they desire to produce at a given time.

Sizing of a paper is also another concern, but something the beginning paper artist may not fully understand. Sizing is a material, such as gelatine, casein, starch, or a rosin that is added to the papers to make the surface of the paper less absorbant so that paints and other artistic mediums do not absorb deeply into the fibers of the paper. There are two ways in which sizing can be added to the paper-manufacturing process, internal and external. Internal sizing is when any of the above mentioned materials are added while the paper is in a liquid state, commonly known as pulp. External sizing is when any of the materials are added to the surface of the paper after the paper has been manufactured from the pulp and is dried. Like the cotton rag and wood-pulp mentioned above, some mills will use a combination of internal and external sizing.

So what does that mean to you? Generally, the more a paper is sized and depending upon the material used to size the paper, the harder the paper will become and the more durable it will be against reworking, scrubbing or scumbling. Sizing also effects the grain of a paper, whick I'll discuss more in a bit, but for now let's look at the paper's surface texture.

There are three different methods that result in different textures in papermaking and each produce a different visual and workablity effect. Those processes are known as rough, coldpress, and hotpress processes.

  • Rough - is when the surface of the paper has a prominent surface texture or tooth that you can visually see. Think watercolor or sketch paper here, that surface is created by the natural result of papermaking process in which the paper is allowed to dry without smooching or pressing.
  • Cold-press - is when the surface of the paper has a moderate amount of surface texture or tooth. It is a result of pressing the wet paper during the process to smooth the paper slightly. Cold-press papers are the most common choice of papers by the paper artist due to the surface texture.
  • Hot-press - is when the surface of the paper has a smooth texture and little or any tooth to the surface. Most smooth and coated cardstocks are hot-pressed although some with textures may be created using a cold-press method as well. This process is created by the passing over the freshly made paper through heated cylinders or rollers during the papermaking process. Watercolors used on hot-press watercolor papers are more loose and difficult to control, yet produce some beautiful blended effects and this paper is excellent for drawing and sketching upon with charcoals and colored pencils.

After the above process is completed the paper is then dried. The drying process also varies by the paper being produced some are hung to air-dry and others are kiln-dried during the papermaking process. Then the weight of a paper is determined. Generally, the paper is cut into large sheets, normally a 22"x30" sheet, and measured by the weight of a ream {500 sheets}. For most artist's papers weights include 60, 80,90,140, 200, 260, and 300 pounds. Heavier weight papers are normally thicker and will withstand more water application without buckling , curling, or warping and can be handled much more often and withstand more abuse than a lower weight and thinner paper can.

Now that you know the processes, ingredients, and methods used to create the various papers, how each handles differnent artistic mediums, does that affect the paper you'll used in your paper art creations?

Well, it does me, especially if I desire to create an artist's journal that I love! I don't want to set any limits to the mediums that I have at my disposal such as acrylic paints, watercolors, colored pencils, pens, inks, and chalks. Nor do I desire the paper to be effectd the techniques or methods I'll use in creating an artist's journal. I desire to work with a variety of papers, everything form printed papers, smooth cardstocks, textured cardstock, drawing and sketch papers, vellums, and watercolored sheets.

The size of the journal that I'll create is also a consideration for me. Since this will be my first artist journal created in this fashion, I believe I'm going to start out using a standard half sheet size, measuring 5 1/2"x 8 1/2". You did know that a standard paper size is 8 1/2" x 11", didn't you? {smiles}

Our adventures......

I really don't know where to start to tell you about the wonderful day Don and I had yesterday. After I updated my blog with the previous post, I set out to getting ready to greet the day by getting around to my shower and getting dressed. While I was in the shower, Melvin, an older co-worker of mine and a friend of Don's dropped by.

It was great to see Mel once again, he is such a character. If you imagine an old age hippie, you've got a visual of Mel, LOL! He is about average height, small built, loves blue jeans, T-shirts, and flannel shirts. He's got the prettiest blue eyes, and a smile that can light up any room, and a beard, filled with grey, and approximately 5" long and a bit scraggly-looking but a personality that speaks volumes. After finishing up, I made us a fresh pot of coffee while Don got Chaos outside, and we all headed out to sit on the rear deck.

Mel's working at a new job in a stone quarry in Upper Sandusky, Oh now and seems to enjoy it a lot. We chatted about old times at DMI, other co-workers we enjoyed, who we've seen recently and who we haven't, and our grandchildren. Mel has a wonderful 9 yr. old grandson who secretly had a crush on me when we rode back and forth to work together at DMI in Delaware. After work we'd often pick him up so he could spend time with his grandpa and grandma and he's often sit on my lap on the return trip home; he always had a smile for me as we chatted about anything and everything. Mel often teased him about Don getting jealous because he was sitting on my lap, LOL! Anyways, we had a great visit and I know he'll be back soon as he'd love to see Amber and Alexxis. I tried to call her but after a late night with Alexxis, both of them were still asleep; maybe next time they'll make it over.

Shortly after saying good-bye to Mel, Don and I headed out to the Mansfield Antique and Flea Market. I managed to find some great buys. I purchased an entire box of rick rack and ribbon for $2.00 and the gentleman threw in a cute little vintage bird I had in my hands. We browsed through a lot of outdoor booths enjoying the sunny day.

A lot of the vendors returned from the previous month's show but the one I desire to see didn't. Lots and lots of antiques..... from kitchen wares to tools, to odds and end pieces were everywhere. We browsed through one building and I swear I feel in love with an antique arts and crafts table. It was beautiful aged oak and was sturdy after all these years. I shied away from the $285 price tag, though. Don did grab the guys business card so we could visit his store in the area.

We walked and wondered some more and I discovered a beautiful iron footed bowl in an oval shape with two small handles on each side. The asking price was $8.50, the girls said she'd take $7 for it when we counter-offered. I cannot wait to fill it with my newly twirled-around popsicle stick ribbons and in my studio!!!

We purchased some fresh fruit, bananas and peaches, and veggies: viadalia onions, green peppers, and tomatoes and on our way out, I purchased a leather coin purse and a new tote bag.

From there we drove to Belleville where we stopped to browse in two antique stores. The first one was simply amazing! Old vintage wallpaper graced the walls, Victorian furnishings, and a variety of antiques filled odd nooks and crannies. Many vendors consign space within the store and I purchased an old vintage nightgown with lace trim on the hemline and around the neckline for $6 and a little blue bird. I'm not certain what type of glass it is but I loved its streamline design. I'll take some photographs soon.

In the second store, we browsed and browsed some more, had a great conversation with the store owner, and left without a thing in our hands.

Our next stop was in Butler, were we stopped into a convenience store for some cold drinks before driving on over into Lexington where we stopped for dinner at Bader's. We dined on a hot and cold buffet and brought two delicious pieces of red raspberry pie home to snack on later in the evening.

From there we stopped at Mohician Adventure to play a round of putt-putt golf. It seems no matter where we are, if there is a putt-putt golf around, Don and I almost always manage to squeeze in a game! Afterwards, we headed west and homeward bound.

A quick trip into Galion for a brief stop at Dennis and Sheila's. When we arrived no-one was home but the house was left standing open so I assumed Sheila had ran up to the grocery store. Tired and weary, we decided not to wait around and drove on home.

Upon arriving home, we got Chaos back inside, played with for a bit throwing his ball, then relaxed a bit in front of the TV eating our raspberry pie before retiring for the night. It was a beautiful day all in all, filled with laughter and delight!

Sunday, June 25, 2006

Good Sunday Morning!

Well, at least it is in this neck of the woods. I woke up early this a.m. Thank you very much, Chaos! He woke me up with his head laying on my side of the bed next to me staring at me, LOL! He wasn't making a sound, just looking at me with those puppy dog eyes. I figure I must have been stirring around a bit to draw his attention. Anyways, its wonderful to wake up and have him there beside me. Raising my hand to pet him is like tugging on his heartstrings which is attached to his tail by the way. He wags his tail and his entire body begins swaying in the same rhythm, LOL! Deciding both of us should use the restroom, I put Chaos out on his lead and head to bathroom myself. I no sooner sit down and Chaos begins raising hell, barking and whining. I think to myself, its way too early for this, Christ the neighbors are asleep! I finish and go to see what is up with him only to discover he has a visitor, another white dog with one loopy black ear approximately the same size as Chaos, wandering around our yard. Well, I don't know about you, but I'm not even trying to get him in all of his excitement back off the lead and into the house. If you've ever wrestled with a 1 1/2' tall, 70 lb. laborador retriever pup, you know exactly what I'm talking about! He could easily get away from me and in his excitement, I'm not taking any chances of me getting injured, so I try to shooo the other dog away. It works for a moment as he ventures into Shawn's yard and then off around his rear fence. Chaos at this point is frantic, barking and whining even louder than before, and I don't believe I've ever seen him move so fast --- okay, maybe once when he got loose from me and I had to run all over the neighborhood trying to catch up with him but we weren't going there today. No, thank you! So, I'm certain our neighbors are really loving him right about now since I finally managed to get him inside and back to sleep. All's well now...... except Don and Chaos are sleeping in peacefully and I'm still awake!

I consider slipping quietly out of the house and into my studio but I know Chaos will hear any little move I make and will whining and crying to come along which in turn means that Don will be awake soon. So, here I sit, a cup of coffee close by and spending some quiet time on the computer before the house starts stirring. Soon enough, we'll begin the hustle and bustle that begins our day, getting showers and dressed to go greet the world. We will going over to Mansfield today to visit the Antique Flea Market, I'm hopeful to be on the road by 10 a.m. Maybe a quick stop into Michael's and Barnes and Nobles..... we'll see. Of course that depends upon just how much I spend at the antique show. I'm thinking maybe we'll venture over to drop in on Mike and Becky.. I'd love to get together with her and her family before they make their big move to Atlanta. Gosh, I'm going to miss her. Maybe we can do lunch at the Crackle Barrel just up the road... I'd love to head into downtown Butler and the surrounding area to visit some antique shops but I really don't know if the are open on Sundays. I know a lot of the Amish areas are closed today.

Anyways, that the promises the day holds for us...... guess, I should go and begin getting ready. {warm fuzzies}

Saturday, June 24, 2006

Another view in the acrylic holder......


Here are the finished file folders in the acrylic stand that will hold them. Behind them are some additional folders that I desire to alter soon. In front of them are two wooden birds that Don and I purchased on a recent trip to Wooster, OH and dinner at The Amish Door.

My submission folders...


Here is the entire pile of them. Each are stamped using Chalk inks in Lime Green and French Blue using Anna Griffin stamps to form a pattern on them. I even stamped the file label area and the label applied over them lining them up as I worked.

"She waited passionately" ATC


This ATC was created for a swap using an altered bobbin. Well, my bobbin isn't too altered, I felt it was definately different. I stamped the image with a vivid ink pad directly onto cardstock, used the lights in my studio to chose te placement of the bobbin after I ran them through my xyron, adhered it and trimmed.

Anyways, there is a story behind the story line that only the ATC swap participants and one other person, my granddaughter Alexxis will share. There is a secret as to where the letters are located that will only be on the ATC that Alexxis will one day receive. The resin covered stamp adorning each ATC was an original addressed on the letters I received. Each story is handwritten by me on the reverse side of the ATC in an accordian folded fashion upon parchment paper and I intend to use an ATC stamp on the front cover. The accordian will be folded and tied using the same thin jute.

The effort continues..

Who knew I'd be actually in an organizing frame of mind today! I am so happy that I made the effort to get my butt out here in the studio {I'm using the computer located within it now...LOL! just taking a quick break to refresh myself.} I've actually made quite a bit of progress, Horray! Horray! I've almost managed to clear off my bookbinding cabinet countertop {try saying that 10 times fast!} and have everything stored below on one of the shelves with some room to grow! Okay, maybe I need to actually use some of those supplies before I even think of purchasing more. And I have a pile to give to my dd, Amber to get those out of my way.

I got my journaling table completely clear with the exception of my cutting tools and my travel Cropper Hopper which is filled with even more tools that I'll desire to have close at hand. I believe I'll create a home for them on one of lifetime brand tables and leave those out, saving me time when creating and making cleaning up more of a breeze. And speaking of my lifetime tables, I have almost everything cleared off of them, just a bit of things left to sift through and that will fill only one of the three tables --- so I have some room to work. I also moved the table down on the wall so that I can put the shelving unit that I recently got back from loaning to Patty beside the journaling table. That will provide me with plenty of space for my markers, colored pencils - when I get enough veggie cans empty to separate them by color and blending, and my calligraphy supplies.

I had a container of ink refills and my alcohol inks out on the tables from where I'd previously moved some boxes out of the house and into the studio, so I worked on filling it up with refills that have been put back into my stamping cabinet. Figuring I'd went that far, I may as well organize my ink pad trays which are separated by Dyes, Chalks, Pigments. My VersaMark, StazOn, Distress inks, and embossing inks are kind of thrown in wherever there is room in the remaining trays. Something I can rectify later along with scraps of cardstock and paper.

Anyways, since I've some room to work, I've decided to start a project. A new project. Which also reminds me that I'll need to establish a place to keep other various works in process a home of their own. Anyways, I believe I'm going to stamp out some file folder labels for the submisison files. Pretty them up, so to speak. With any luck that will assist me to focus more on that this upcoming week.

My Submission Folders are done...

and if I must say they are beautiful! I used Anna Griffin's line of rubber stamps to create a wallpaper appearance on the folders using lime green and french blue to stamp one them. I have them spread out on my tables allowing them to dry a bit since the folders themselves have a coating that makes them a bit glossy. After cleaning up the mess and my stamps --- Yes! I cleaned up! I decided using my heat embossing tool would speed up the drying process a bit.
So, into the house I went to retrieve my heat tool when I realized what time it was..... 3:30 p.m. and I that I haven't had anything to eat all day.

By now you'd think I'd realize that this is a major no-no - skipping meals, so I decided to fix myself a grill cheese sandwich and eat some freshly sliced pinapple while my sandwich cooked. Grabbing a bottle of water along with whatever miscellaneous supplies I could squeeze into my hands, arms, you name it, I returned to the studio refreshed and rejuvenated.

I realize now that I do need a clock in the studio and maybe even an alarm clock. I could set it to remind me to take a break every so often, like every 2 or 3 hours. Taking some time out to play with the dog may keep him from having so much pent-up energy and I may even find some time to relax a bit inbetween making some time for other pursuits besides just grabbing a bite to eat.

Another thing that I realized is that I tend to work around Don's work schedule a lot. I think I may need to either help him discover a hobby for himself or just get him used to the idea that I need some time for my own pursuits. Definately more time management issues to be dealt with. I often dream of sneaking quietly out of bed some nights when I have trouble sleeping and escaping out here. Maybe soon.........

Oh, and on my next trip into the house, I'll grab the digital camera so I can upload some photographs of my pretties later. Until then.......

All play and no work...

isn't helping me to accomplish anything! I've spent the last hour {was it really an hour?} posting online and browsing some of my favorite blogs that I visit for inspiration. Well, the inspiration is definately here and unfortunately I cannot do too much about it since my studio tables are still in a bit of shambles from the recent sorting, plurging, reorganization efforts and strides I've recently made. But it was a sacrifice I desparately needed to make. Now, I've determined that this cycle will continue IF I don't do something about it, so I'm off to the studio to finish up some things. {My poor head is spinning with inspirations and ideas.........}

I believe I have the majority of re-organization tackled, now to get started on tying up those loose ends. I know that I will need to eventually clean out my stamp cabinet but I really hate to start yet another re-organizational project just now, especially since the ideas I have will require me to utilize some of my rubber anyways. Oh, it is a vicious cycle! LOL!

So I'm heading out to the studio to continue working on getting things put back into their proper places. If I can clear off the tables today, I'm thinking maybe I can utilize some delegation and possibly get Don involved in assisting me moving some supplies out of the house and into the studio either today when her returns home form work or when we return from thrifting at an antique flea market tommorow.

Urgent Update: {Okay?} Don just telephoned me and in our conversation he mentioned he has the opportunity to stay and work later if he so desires. I told him I really didn't mind if he chooses to. It is sort of one of those up-in-the-air subject to change at a moment's notice type of things but anyways I intend to take full advantage of the opportunity to get more accomplished. Another plus side is that we'll have a bit more money on hand for spending tomorrow, LOL! {I may just need to remind myself to be a bit more selective in my purchases.} Anyways, I'm hopeful that the weather will hold out so I {now we} can get this move accomplished.

So, I'm going to go and get back to tackling this once again. My biggest joy will be in getting it finally completed. Needless to say, I'm itching to get creating once again vs. talking about doing it! {*big smiles}