I worked Friday on creating the Postage stamp ATC swap and 3 ATC's for a personal swap the swap hostess . I am happy to say that all are done and I am extremely happy with the way they turned out. My late afternoon and early evening was spent resting. I actually managed to slip in a nap! A long nap... {sigh... it was heavenly!} After Don returned home from work late in the evening, we headed up to the Moose Family Center for a while and listened to a band. It was great to get out and mingle for a while.
Today, I seemed to have hit the ground running. Amber and Chris came over to borrow a few of my studio tables for a yard sale that they and Chris' parents are having Saturday and Sunday. I quickly checked my email and got to work on computer maintainance and my housework.
I cleaned 80% of our bedroom; still need to tackle our closet as the seasons here in Ohio are changing; managed to do several loads of laundry, then started to work on re-arranging our living room.
After picking up, dusting , vacuaming, and moving a few pieces of furniture, I got the bright idea to start painting. I mentioned before about how I thought about painting only the bottom sections of our walls and adding in a chair rail, so that is what I started. Only to run into a problem with the paint I had purchased. It wasn't at all the color that I had choosen... For some reason it went on the wall in a yellow-orange color vs. the harvest gold I'd picked out. One coat on one wall and I knew that there was no way I could live with it!
A quick telephone call to Don, with me totally freaking out! and one look at it when he arrived home, we decided to headed out to Lowes. Once there, I looked for a while and decided to unexpectly go with an entirely different color. I choose a Pine green/ deep hunter green color.
As soon as we returned home, I was opening up the paint and painting away. I finished up a couple hours ago and I gotta say that I love it! I am so excited about purchasing the baseboard, that we will stain ourselves and install, and later on the chair rails that I will paint white. I decided to stay with the white on them as the window and door trim is already white. I just think it will flow better within the space. I'll have to upload some photographs of our living room soon. Right now, I'm too tired, lol!
I still have painting in the kitchen to finish and since I love the hunter green color so well, I'm considering painting the side walls in the red and the back wall and door in the hunter. I'm thinking the dark green will add a beautiful contrast to the red and pull the rooms together for a more cohesive look. But that, my friends, is a project for another day! This girl is beat! {and trying her damnest to stay awake! I want to run out to Wal-Mart at midnight in the hopes of snagging up a T.M.X. Elmo for Alexxis for Christmas. Normally, I don't worry about what is hot or the current trend but that thing is adorable. It matches Alexxis' happy go lucky personality to a "T". I can see her in my mind's eye, laughing her little belly laugh at it! Wish me luck!!!}

Saturday, September 30, 2006
Friday, September 29, 2006
I forgot to mention....
{Geesh, is that my theme today? I forgot...lol!} The screen is simply washed out after the desired number of prints are created. You can make as many prints as you'd like, up into the hundreds, by applying more ink when needed. My instructional book mentioned using cold and hot water and I couldn't remember which, so I simply used a luke-water about room temperature and it worked fine. Just set the screen aside to dry and it is ready to go the next time you are --- just hold it up to the light and look for any areas that may need to be filled with the screen filler once again. My screen appears to be in good shape. Rinse your squeegee after returning any leftover ink back to the jars and seal them.
If I do decide to create several prints from one or more screens at a time, I'm going to have to create me some sort of "clothesline" to hang the prints up to dry. I've seen clothespin and bulldog clips used to hang them. HTH's anyone who may be interested..........
If I do decide to create several prints from one or more screens at a time, I'm going to have to create me some sort of "clothesline" to hang the prints up to dry. I've seen clothespin and bulldog clips used to hang them. HTH's anyone who may be interested..........
The "Good News" about my screenprinting...
is that all is not lost! I can go back into the screen and fill in some of the areas, such as the inside of the banner and a few other areas that my ink seeped through, however lightly, and refill it. Once it is dry and checked once again, the drawing ink is applied before my flood and print strokes are made.
Oh, and the ink itself, is water-based, and not exactly like the ink a rubberstamper is used to which is more fluid-y and thinner in nature. It is thicker in consistency, comparable to the Golden's Fluid Acrylics in consistency with a touch of gel characteristics. I had to ask Don if it was supposed to be like this, lol. Once mixed with the extender base in a 1:1 ratio, it is ready to be applied to the screen.
As I mentioned before it takes very little. Don applied mine to the screen for me and I was even amazed. He put on a bit more than we need but it can be returned to the bottle afterwards by gently scrapping the squeegee so there is little waste. As far as an amount goes, remember I used a 8x10 frame, so I'd say about a 1/2 teaspoon is plenty. We used a plastic disposable spoon, but from some experience with painting, next time I want to try using a palette knife to spread it across the bottom of the screen the length of my squeegee. Just remember if you try this, the flood stroke is made while the screen is lifted off the object your printed onto, then lowered prior to making the print stroke. It is truly easy!
Also, if you are a mixed media artist who'd like to try this without too much expense, I saw a tutorial on a live journal blog by craftgrrl who used silk screen and embroidery hoop and modge podge to fill the fill the masked areas. It worked great! Here is a link: www.livejournal.com/community/craftgrrl/3674467.html Of course, you'll need the black screen printing ink and possibly the base extender. Enjoy!
And my first print...
 This is my first ever silk screen print! I made a couple mistakes with this but the good news is it can be rectified on the silk screen frame and hopefully my subsequent prints will be a bit better. First, I forgot {there is that word again!} to fill the inside of my banner with screen filler to leave only a small outline of it. Therefore, it printed out black, lol! The second mistake that I made was in my haste to create my first print, I forgot completely about adding in the drawing ink. {Supposedly it assists with the flow of the ink through the screen.}
I'm certain that if I keep with it that I'll continue to improve, like anything else that anyone does --- practice makes perfect! I am a bit envious of some of the silkscreen printing that I've seen, some artists are getting some very fine details within their artwork. Also, I am not aware of anyone that teaches classes in my area, I'd so love to take a few! Maybe, one day I will.


Where is my mind?...
I managed to get the bases for my Postage swap ATC's cut out. Whhooo! Huge step in the right direction, Ha. Ha. But anyways, I do like them. I did something a little different and since a few of the ladies in this swap also read my blog on occassion, I've decided to keep it a secret until the swap has been received.
Anyways, I made one trip out to the studio to gather up some additional items I need and forgot to grab up a sheet of parchment paper and the actual postage stamps for the collage I have in mind to create, so I set aside the rubber stamps, inks, ep's and various items I'll be using. Urghhh.
But thinking about this swap also reminded me that I have a one on one swap with the hostess for 3 ATC's: 1 Halloween and 2 whatever we conjure up without any specific theme. So, I started on the Halloween themed one and while the glue was drying, moved on to cutting out all my lovely bats for a Halloween themed garland and a window decoration.
Somehow, the other day when I went to the studio to get the necessary black and orange cardstock for that project, I forgot to grab my CM oval cutters. So, I made another trip out and forgot to grab the parchment paper and the postal stamps again! Maybe it was a good thing as I needed to be focusing on other things in our home besides creating.
Thursday, September 28, 2006
Various works in progress...
Today I cut out my base cardstock for the Postage ATC's swap and stamped out a card as to hold my return postage, serve as a, " Thank you for hosting card", and hold my Hostess RAK. I need to make a run out to the studio to get some parchment paper and actual postage stamps since I brought the majority of stamps into the house when I was creating the recent tags I created. My objective for the day is to begin working on those. As the ink is drying, and the embossing is done, I can set them aside to be finished up one day this week... probably on Saturday while Don is working. This is my final swap commitment, other than the pre-existing Art Idea Journal RR, so that I can focus on getting the Christmas gifts I need to create, created.
I need to begin on Mieke's Art Idea Journal. Creating my whimsical writing pages as I watch TV in the evenings so that I can get her pages created. I will be wainting for pages from Christy to arrive to include in so I have some time on them. Hopefully by next weekend, this will be ready to mail.
I'm in the process of juggling a few projects. Two banners --- one halloween one to hang in my home --- a combination of bats and pumpkins; the other is a banner for my studio that will have a bird theme and spell out the word, "FLY" I'm hoping to complete it then stencil, "allow your creative dreams to" above it on my wall above my journaling/stamping table.
I think that once my studio is re-organized once again, I will move some of the shelving on the slatwall just so it isn't in the straight line it is now, but stair stepped and allowing me to display more of my artwork and the trinkets and treasures that I love. Trust me, if $$$ wasn't an object, it would already be done, LOL! Well, I cannot quite say that as some pieces are artwork that I've yet to create...
I am one can shy of having all the cans that I am desiring to make into Tinnies for holding my colored pencils. I decided I'd like to divide my 120 count box of Primsmacolor pencil by color and one extra for accessories. Now, I need to sort through my printed paper to determine if I have enough papers in a vintage styleto tie in with the old world theme within my studio. I also need to go through my stash of ephemera so that I can make some copies of those that I am desiring to use to decorate them. I can see them finished in my mind's eye. I am also desiring to get back to creating my neglected gratitude garland and start creating another shrine, so I'll be digging out some cigar boxes and wooden boxes to prep soon. Unfortunately, there is only so many hours in a day that I set aside to creating and crafting!
I will upload some photographs soon, I promise. {My scanner is acting up so all artwork will have to be captured with my digital until I get that straightened out again.}
I need to begin on Mieke's Art Idea Journal. Creating my whimsical writing pages as I watch TV in the evenings so that I can get her pages created. I will be wainting for pages from Christy to arrive to include in so I have some time on them. Hopefully by next weekend, this will be ready to mail.
I'm in the process of juggling a few projects. Two banners --- one halloween one to hang in my home --- a combination of bats and pumpkins; the other is a banner for my studio that will have a bird theme and spell out the word, "FLY" I'm hoping to complete it then stencil, "allow your creative dreams to" above it on my wall above my journaling/stamping table.
I think that once my studio is re-organized once again, I will move some of the shelving on the slatwall just so it isn't in the straight line it is now, but stair stepped and allowing me to display more of my artwork and the trinkets and treasures that I love. Trust me, if $$$ wasn't an object, it would already be done, LOL! Well, I cannot quite say that as some pieces are artwork that I've yet to create...
I also sat down and sketched some ideas and inspiration for decorating my studio with artwork on Monday before Amber arrived. {Some of it is inspiration that I've found online created by many other artists; while others from ideas in magazines, and notes that I have made for some things I'd like to create over the years.} My desire is for the artwork is that it is not only eye candy, but functional as well. I've started on some of them, remember the Artistic inbox that I created back in August?, while various others are waiting to be born. Working on Christmas gifts will be taking priority in my life soon, so I'll have to work on these whenever I can. Of course, there are a variety of other projects, but there is no way that I am even thinking of starting any of them just yet. I definately need to start tying up some of these loose ends first. But hey, a girl can dream!
I am one can shy of having all the cans that I am desiring to make into Tinnies for holding my colored pencils. I decided I'd like to divide my 120 count box of Primsmacolor pencil by color and one extra for accessories. Now, I need to sort through my printed paper to determine if I have enough papers in a vintage styleto tie in with the old world theme within my studio. I also need to go through my stash of ephemera so that I can make some copies of those that I am desiring to use to decorate them. I can see them finished in my mind's eye. I am also desiring to get back to creating my neglected gratitude garland and start creating another shrine, so I'll be digging out some cigar boxes and wooden boxes to prep soon. Unfortunately, there is only so many hours in a day that I set aside to creating and crafting!
I will upload some photographs soon, I promise. {My scanner is acting up so all artwork will have to be captured with my digital until I get that straightened out again.}
Back to the screenprinting...
While at K-Mart, I remember to pick up a roll of duct tape to tape up the silk screen frame. Upon arriving home, I sat down and did exactly that. I was so anxious to actually create my first print that I had to mix the extender base and black paint and try it!
My first attempt wasn't so great... so I did it again, and again... the third print, I can live with. But I noticed one mistake. I forgot to seal in the inside of the banner, so guess what happened? Yep, the black ink filled it in. I'll take some photographs later today of the screen frame taped and my first ever print and upload them for you to see. Just remember, I'm new at this, LOL!
My first attempt wasn't so great... so I did it again, and again... the third print, I can live with. But I noticed one mistake. I forgot to seal in the inside of the banner, so guess what happened? Yep, the black ink filled it in. I'll take some photographs later today of the screen frame taped and my first ever print and upload them for you to see. Just remember, I'm new at this, LOL!
A hectic week...
It has been a very hectic week! I've been helping Amber with Alexxis the last 3 days and this grandma is worn out! Although, I love having and being with that little one, I have completely forgotten just how much time and caring goes into a little one. Alexis is exactly 5 months old today and she is currently cutting more teeth. She is such a good baby, even with the teething going on... I feel for her because I know what cutting teeth feels like as I had one heck of time cutting in my wisdom teeth, but all in all she is handling it well. Of course, Tylenol and Ora-gel are her new best friends, LOL!
After Amber and Alexxis returned home yesterday evening, Don and I headed over to KMart to make a layaway payment on Alexxis's christmas items. We made a quick stop into AutoZone for a set of new windshield wiper blades, and man, are we so very glad we did! On the way home we had a thunderstorm come upon us which DUMPED rain! Lots of flashes of lightning and thunder... water on the roads; I could feel the truck start to hydroplane a couple of times, which really scared the be-jesus out of me. I don't do accidents very well after my car accident in '99. I don't think I've ever been as grateful to arrive home safe and sound ever in my life, it was that bad!
After Amber and Alexxis returned home yesterday evening, Don and I headed over to KMart to make a layaway payment on Alexxis's christmas items. We made a quick stop into AutoZone for a set of new windshield wiper blades, and man, are we so very glad we did! On the way home we had a thunderstorm come upon us which DUMPED rain! Lots of flashes of lightning and thunder... water on the roads; I could feel the truck start to hydroplane a couple of times, which really scared the be-jesus out of me. I don't do accidents very well after my car accident in '99. I don't think I've ever been as grateful to arrive home safe and sound ever in my life, it was that bad!
Tuesday, September 26, 2006
Okay, common sense won out...
I decided since this is the first time I've ever create a silkscreened print, I better follow all the instructions to the letter. So, therefore, I went back and brushed on screen filler to the remaining areas of the screen frame on both sides. I left a 1" border around the frame as this does need to be taped off. Taping this off assists with the screen not getting stretched out of shape, which is difficult to happen unless you aren't doing something right. It is a squeegee for christ's sake that runs smoothly over the silk screen. At least, I managed to also "patch" my holes that weren't sealed in the process.
I'm excited now... being so close to being able to try my first print. It sucks not having the tape. Don's off tomorrow so we're gonna have to rectify that and he will be here to help/assist. Wish me the best of luck: I'd love to get a great impression on the first try!
I'm excited now... being so close to being able to try my first print. It sucks not having the tape. Don's off tomorrow so we're gonna have to rectify that and he will be here to help/assist. Wish me the best of luck: I'd love to get a great impression on the first try!
Making progress...
I just sealed the reverse side of the silkscreen an hour or so ago. By holding it up to the light, I can see a few areas that I definately will need to touch up so the ink doesn't seep through where it isn't desired.
I also went on a search and believe it or not, I don't have any tape that can used to seal my screen. Darn it, I even looked at it while at Dick Blick's... hhmmm, now I am wondering how duct tape would work, LOL! That is Don's mom's cure-all! I may try it... but again, I'd have to purchase a roll. My only worry is that I don't want to ruin my screen. Hmmm, maybe I should just use the screen filler and fill it all after all. Decisions, decisions.....
I also went on a search and believe it or not, I don't have any tape that can used to seal my screen. Darn it, I even looked at it while at Dick Blick's... hhmmm, now I am wondering how duct tape would work, LOL! That is Don's mom's cure-all! I may try it... but again, I'd have to purchase a roll. My only worry is that I don't want to ruin my screen. Hmmm, maybe I should just use the screen filler and fill it all after all. Decisions, decisions.....
Silkscreen...
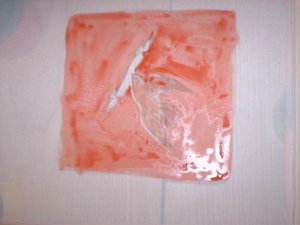 This is the silkscreen in the process of being filled with the screen filler and in various stages of drying. Remember, I am a complete "newbie" to this, LOL! I've decided that after this layer of the screen filler dries on the print side of the screen, I'll flip it over and apply the screen filler to the opposite side. Once it is dried, I'll need to check and be certain that all areas in the screen that I desire not to print are filled or sealed in. The area surrounding the image will be sealed with tape to seal them. This will simply save me on the amount of screen filler required to print this image; therefore saving me $$$ in the end result. I'm so excited about this process; and cannot wait to see the final result.
Ta...Da...
 Here is the design after I used the pencil to transfer, or trace the design onto the silk screen. My image won't have as much detail as you see from the printed image as I will be working with a paintbrush to apply the screen filler in the areas that I desire to remain white and not print, while the areas that I do desire to print will receive the drawing ink. It's a start!!!!
Inbetween...
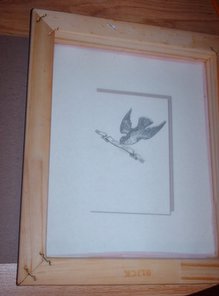 Changing diapers, feeding, cuddling, playing, and laughing with Alexxis, gettting dinner on the table, and the dishes done, I managed to get the silk screenprinting frame prepped by washing it to remove the sizing! Here is my design under the screen ready to be pencilled in onto the screen!
Inbetween...
changing, feeding, playing, snuggling, laughing with Alexxis today, getting dinner on the table, and the dishes done, I managed to get the silk screenprinting frame prepped for beginning! I just got the image drawn on the screen and will upload the photographs for you. Enjoy the journey! {I am! (along with all the possibilities) Gotta love that!}
The JOY's of being a grandma...
I have Alexxis again today! Mommy and Daddy have been job hunting. Diligently, I might add. I think in some ways my conversation with Amber on Saturday made her realize that this is truly a temporary problem, and no matter how bad you think you have it, there is always someone who is a little worst off. I can understand her disappointment and her desiring a better life for herself, her family, her little one. I can understand her becoming depressed and I can sense and know when she needs a 'cheerleader" in her court. And on Saturday, that is what I was... not a friend, not her "mother" {in the "lecturing" sense of the word}, but a listener and a life coach and someone who will always be there, picking her up when she falls downs, dusting her off, helping her to stand on her own two feet once again. That's my job as her mom, no matter what age she is. It is the very same thing that my mom is to me! My confidaunt, caring encourager --- regardless of small, how seemingly meaningless my biggest concern is to her.
Anyways, I've been caring for Alexxis, both her and at her home, while Mommy and Daddy are working on resume's; going through the phone book for possible places for employment, looking in the paper and online. Running here and running there. The good news is Amber is at an interview as we speak. It is a temporary full-time position expecting to last only three weeks --- but it is something until something better comes along. She also has been through two interviews with another company. Yesterday when checking on it, she was informed that she was the first one to be called and they were hopeful that she'd be available when the opportunity becomes viable for them to need her. {A possible contract has stalled: but still looks promising!}
Please keep my dd, her family in your thoughts and prayers; like all of us, they deserve a good break now and again.
More about my Art Idea Journal...
I know that is possible some of my readers may be wondering why I am writing all this about my art idea journal. The answer is a simple one, I desire to capture the experience and be able to look back years from now and to be able to remember how it felt when we {all of us who participated} were going through the process of it all.
I want to include those feelings, the anticipation of a journal being in the processes of the postal system and knowing that yet another is one its way to me, and to capture the excitement of seeing one of them within my mailbox --- eg. in an huge envelope or priority box sitting on my porch. I want to capture the excitement and the sigh of relief that I experience as I realize and say a prayer of gratitude that not one of them was ever lost of misdirected. It isn't so much about my own experiences either, it is in the knowing that 16 other artists experienced the same thing and interpreted the experience slightly differently. Also, I can honestly say that if a survey or questionaire was formed that asked each and everyone of us if we'd do it again, knowing what we know and have experienced throughout it all, that I believe the answer would be a reasonating, "Yes!" Sort of like the angels in the heavens, singing, "Halluelah! Halleulah!"
It is this that I desire to look back upon and remember. It is the excitement, the wonderment, the astonishing feeling that another artist's artwork reasonates within each of us. It is in the magic of all the possibilities that travel through your mind when you see one or all of the techniques and know that you will one day desire to create it and use that knowledge within your own artwork. In fact, that has already been done! In a recent post on the byhand group, one of the participants, Yogi, informed me that she has used the Whimsical Writing alphabet and technique that I've provided within these journals on some of the artwork that she recently created. It is that feeling! that I contributed to the knowledge of another artist and that the technique will live on and on in another artist's artwork that makes this journey a bit more special.
Another reason is fear. Fear? Yep, fear. The fear that if I don't capture those feelings now that somehow they will be lost and never remembered with quite the same clarity that I am experiencing now. And as my own art idea journal makes it way home to me, I am beginning to think and consider how it will be bound and I've decided that within the pages I want to capture the essence of this journey and the journals by including this information. Why? Because one day when I am no longer on the face of this earth and as my family goes through all my worldly possessions, they will one day come across this journal. I want them to know how special this project was, how much it meant to me, how much planning and work and a piece of each artist's heart that has poured out upon its pages, and I want my grand-daughter Alexxis to have it and to know the love, the caring, the concern that went into each of them. I hope she finds that within those pages and not only cherishes the journal for what it is but somehow finds some amazement in the knowledge that there 16 more journals, similar to mine, out there being enjoyed somewhere in the world. Who knows maybe she'll be excited enough about this project to one day wonder where the remaining 16 of them are and do her own search to find them; not the journals themselves, but the relatives of those of us who participated within them. You got to admit that it is a wonderful concept!
My own Art Idea Journal.. and how it came to be.
The journey actually started to begin in January within Suzanne's from http://quietfiredesigns.com Byhand Yahoo Group when Susanna, from Finland, made a comment regarding how wonderful it would to have an art idea journal to refer to that was created from the members of the Byhand group. This comment originated after she had received some spectacular artwork in several swaps and Deco RR's. Once the comment was made, the idea just sort of snowballed from there, each of us adding in what we'd like the journals to contain such as a technique that so and so used in this swap, or a background that another participant used in a Deco. It didn't matter who posted or who commented each of us knew we'd cherish having something of that nature in our possession.
It wasn't simply about containing the artwork, we all desired a technique tutorial! Provide me with a step by step tutorial so that I can recreate it. As the discussion continued, so did the ideas! They simply poured out of each of us... like we'd love to see photographs of one another's art studio's and spaces, read about one another's creative process, and how the book would even cooler filled with art and creativity quotations, and then it was back to discussing what each of would to learn from one another, sort of an "I'd like a personal one on one class with so and so learning to do this....."
It wasn't long after that few weeks of bouncing all of this off of one another that Susanne thought that we could make this dream and the daydreams of all these comments on a message board within the group, become a reality. She suggested the Art Idea Journal RR, where each of us would create a journal and the RR would begin. We formed a new group where even more ideas were thrown out and tossed around until one day it was decided that we'd two groups of participants within this group. Everyone was invited to sign-up for whichever group they desired to participate within and some even signed up for both! The two categories within the group were a lightweight already bound journal and the other a pages only group that could be bound by each participant upon its return home. I signed up for the pages only group and glimpses of the journal that I created as we embarked on this Art Idea Journal RR can be found in my February 2005 archives.
It was sort of our version of the True Colors journal RR but with a twist of anything goes! To quote on Suzanne's amazing calligraphy style rubber stamps that uses a William Wordsworth quotation, "Fill the paper with the breathings of your heart..." and that is exactly what each of us did! Every journal is unique in its own way as each of us worked on creating our own journals we added in what we envisioned for our own to be once returned to us.
As the journals circulated and page upon precious page was created and even though some of the techniques were repeated within them, each and every one is uniquely created for the original creator, author, and designer. I have never participated in something so beautiful and amazing before in my entire life!
Would I do it again today? Knowing that it would embark on an almost two year journey? Yes! and in a heartbeat!!!!! As the journey begins to make its way through the final stages and the end is near, it is bittersweet. I am excited to have my journal returned to me and wait anxiously for the day that it arrives, yet a part of me is going to greatly miss the communication, the companionship, the love, the caring and the compassion that each of us have shown to one another throughout the journey. I know that we will stay in touch, continue to swap artwork, continnue to participate in even more Deco round robin's but there will never be another Art Idea RR journey quite like this one. It is that knowledge that makes each and everyone one us desire to hold our own journals within our hands and as close to our hearts as we physically possibly can! What an amazing adventure it has been! Throughth personal trials, illness, and deaths, we managed to pull this off and remain a bit more than simply inter-continental artists who exchange artwork, we've became a family and shall forever remain friends!
Art Idea Journals and other artistic adventures....
I received Mieke's Art Idea Journal from the RR in the mail yesterday. I cannot stop gushing on and on about these magnificance journals! It doesn't matter how many of these journals that have passed through your hands, each and everyone has its own unique characteristics that just cause your jaw to drop and are filled with some the most amazing eye candy I've ever held within my hands.
Mieke's journal has sort of a chapbook theme going on in it. As she created it, she made several pages in a chapbook style and then asked that each artist do like-wise in addition to the artwork that they created within it. Every page is a masterpiece..... I could pick up any one of these journals at any given time and find a new little detail that I'd somehow missed the time before.
Since I have anotherl swap deadlines looming, my artistic time is going to be full and I will be shuffling back and forth between projects. This shouldn't be as hectic as it sounds since some of it will relate to preparing the silk screenprinting frame and while it is drying inbetween each step, I can begin to work on something else. My postage ATC swap will also be created in steps that will require some drying times so while those are beginning to take shape, I can work in the evenings while watching TV to begin my whimsical writing pages for Mieke's journal. I will most likely have Mieke's journal in my possession for a little while as this journal was sent to me, skipping one participant while she works in my journal and creates Mieke's journal pages so that all of them can be sent to me together and we don't get bottlenecked again.... meaning one participant holding a few of the journals and the next participant having none to work in.
I am excited about this RR cominng to an end... As I've mentioned previously that means my own journal creation will be returning home to me and other participants will be recieving their journals. It is somewhat of a bittersweet ending........ I have been in a lot of online swaps for artwork and RR's, but I can honestly stay that the communication within this group of ladies has been the most fabulous. Regardless of what curve life has thrown at each one of us, we've managed to maintain contact and communication over the last year and a half. I don't think anyone of us anticipated the time it would require for 17 participant to send and receive and to create within these journals but I know we all agree that each and every one of the journals is both a work of art and a masterpiece.
Sidetracked....
I didn't manage to get my silk screenprint prepped as I had a welcomed visitor come to visit. Spent the majority of my day stealing sweet kisses and stocking up on as many snuggles and hugs as I could get from Alexxis. I watched her here while Daddy went on a job search for the afternoon, then, returned with Chris and Alexxis to their home to spend time with the three of them. In the evening, we ventured back to our home and made it an enjoyable evening with take out pizza and even more visiting. It was a wonderful break from the mundaness of everyday.
Amber and I chatted about the two accordian books that will be gifts for Chris's sister, Mickey and for his mom. I explained the process of how the books are actually created to Amber and we discussed ways to keep our cost down by scanning in their photographs, saving them, burning them to a disk before having two prints of each photograph developed and what we can make out of our supplies to enhance the final appearance of the books.
Amber and I chatted about the two accordian books that will be gifts for Chris's sister, Mickey and for his mom. I explained the process of how the books are actually created to Amber and we discussed ways to keep our cost down by scanning in their photographs, saving them, burning them to a disk before having two prints of each photograph developed and what we can make out of our supplies to enhance the final appearance of the books.
Monday, September 25, 2006
The desire to create and clarifying my own thoughts...
Have you felt like you NEED to create something or all the inspiraiton and ideas that are floating around in that pretty little head of yours would explode with all the possibilities? Well, that pretty sums up what's going on with me today!
I am envisioning all these things that I can screenprint, but there's only one problem, LOL! I've never done this before.... Ok, certainly I have the information required to start, I mean come on how hard is to use a degreaser like Simple Green and soft nylon scrubby to clean a silk screen. From what I've read so far, that is the first step. It done to remove any sizing from the silk because if left in, your ink just may not flow through the screen in places and this prevents that and is supposed to assist with obtaining a clearer image. Then, the screen needs to dry completely. I've read that you can use a hair dryer on low heat to accomplish this. Okay! I can do this.
Next, is finding an image you desire to use. Of course, if you are real good you could draw your own but in my case I've several in my mind and drawing them onto the screen is a completely 'nother story. So, I spent some time online looking for copy-right free images... you know, B&W bold and solid and outline dingbat style of images. From what I am seeing, bold, solid images are excellent for screenprinting. I found some that I desire to use, the only problem is that the grey-scale in the images is going to be hard for me to achieve. Within the screenprinting kit I purchased there are two 4 oz. bottles - one is a screen filler the other is a drawing fluid. {There are two others however they are for use with the photo emulsion style of screenprinting and requires a lot more items than I have available to me at the moment. It is an entirely different method of screenprinting which actually burns the image onto the silkscreen.}
I am planning to do the basic pulling the ink through the squeegee {aka... "ghetto" method, LOL!} From what I am understanding is... once the silk screen is cleaned to remove the sizing, dried, you are ready to begin. Draw your image onto the screen using a pencil. After the drawing is complete, you will have two areas {they are called a positive and a negitive} in the image and it confuses the be-jesus out of me which one is which, LOL! I'm certain that I'll learn that as I get going. For now, I know enough that if I am desiring ink to flow through the screen and onto the paper or fabric to form the image I've drawn on the screen, I place the drawing fluid there. For the areas of the image that I desire not to print, I use the screen filler. The drawing fluid draws the ink into the screen, while the screen filler masks areas. Got it!
I mentioned before, I am a beginnner at all this, and you have to realize that your talking to a paper arts mixed media artist here so my mind interpretes things in a way that I can understand them. Therefore, it would seem to me, that once the screen has the image drawn on it, if I marked a small "X" inside the image in the areas that the screen filler is to be used, it would assist me greatly. I also believe it would be easier, for me anyways --- the beginner, LOL! to fill the screen with the screen filler first. From what I read in the instructional manual, the screen filler is used full strength and is applied to the screen using a paintbrushto both sides of the screen. Check. {a paintbrush was included in my Speedball kit. It is a long bristle round brush --- other than that info you are on your own, sorry. That is all the information there is. No type of brush, although it appears to be nylon... and no size given.} I believe that I'll start on the inside of the screen within the image, then move to applying it to the outside surrounding areas of the image and wait for that to dry. Once that is done, you flip the screen over and apply the screen filler to the reverse side. Okay.
Now comes some more info.... when you working on the silk screen within the screen frame, the screen frame and the silk screen contain within the center of the frame has to be raised on all four corners or tilted when applying the screen filler and during the drying process. Kinda makes sense since if it is laying flat wouldn't the screen filler absorb throught the screen and onto whatever surface your working on? and wouldn't that result in the possibility of some areas of the screen not being filled? Kind of defeats the purpose of the screen filler... to fill the screen, huh?! {grin! Hey, I learned something!}
Moving on....... once the inside area of the screen frame is sealed in all the desired areas, {this is known as "the printing area" says Don}, the screen is flipped over the process repeated on the reverse side of the screen. I've also read and Don has mentioned that you can hold the screen up to the light and see any areas that you desired to be filled that didn't fill with the screen filler. Anyways, apply the screen filler to the reverse side and allow it to dry. Once dry, you are on your way to creating your first print!!!! {At least, when I get to this step, I will be anyways!}
My screen is prepared. {Not in reality, bu in my thought processes...} From here, I have mixed my extender base with the water-soluble black screenprinting ink in the 1:1 ratio {meaning one ounce each}. I read this makes the fabric ink suitable for printing on to paper. {I'll discuss the types of paper to use later and share some of my experiments here, probably in another post.} After this step is completed, my ink is set to go.
Are you still with me? LOL! Okay, my silk screen in the frame is ready, my ink is ready, and now, finally, I'm ready to create my first print. {Remember, I am clarifying this in my mind... so I can sort of figure this all out, LOL!} I apply the ink, Don says it doesn't take much... {Hmmm, what does that really mean? A half teaspoon... teaspoon... a half a tablespoon? He will be assisting me here. I'll let you know when I have that answer!} Anyways, whatever the amount of ink is, it is applied to the edge nearest to me. I take the squeegee and position it at an angle {30 degrees? 45 degrees?} away from me, with the screen raise --- elavated --- up off of the paper I'm intending to print upon, and puch the ink up over my design and into the screen filled areas. This step is known as a "Flood" or "Flood print or a Flood Stroke". It applies the ink into the screen opening of the design you are desiring to print. The next step is the actual "Print" or "Print Stroke". The screen is now lowered, level onto the paper, the squeegee is repositioned to the opposite side of the ink by lifting it up and over the ink you just moved in the flood stoke and again angled and ready to be pulled towards you. Once completed, the ink moves back over the ink in the silk screen, it adds to the ink previously added to the silk screen during the flood stoke, and pushes it out onto your paper. {At least in my mind anyways!} The screen frame is then lifted, the printed paper removed and hung to dry. TA. DA.
What is the purpose of all of this? The main thing that attracts me to this entire process, is that once a design is imprinted/designed within the screen frame, it is usable over and over as long as you check the screen to be certain that the screen is filled where it needs to be filled. This process allows you to reuse and reuse the screen over and over and over again! Now that is what attracts me! It is like a stamp..... only a printmaking technique! It is usuable on both paper and fabric. My mind races with all the possibilities of it! Cards, bookmarks, stationery and fabrics! T-shirts, tote bags, blue jeans....... Mixing , blending LOL! Okay, maybe not as cool as owning your own letterpress, but Hey! it isn't as expensive either!
Paper Types:
From what I have read, most papers can be used with this process. Okay. Now come on, as I paper arts artist, my common sense says, "Yeah right!" So, let me clarify this a little bit. "The Speedball Instructional Manual" says, #20 weight cardstock is acceptable and anything above. I would suggest avoiding any coated cardstock and glossy papers. My mind tells me the ink should be absorbed into the fibers of the paper and allow to dry. Therefore, I will be experimenting using a variety of papers... hmmm, cardstock and watercolored. {I looked at Dick Blick's and somehow missed seeing any printmaking types of paper and by then my art budget was already screaming so I left without it; although I am certain that the Arches and Rives would be a pefect paper to play upon.}
So, there you have, my thoughts, my comprehension, my understanding....... and all that from a beginninger. {Keep in mind, I have yet to do this....} but when I do, I'll be more than happy to share my results with you!
Our Sunday, continued....
Okay, I can't leave you hanging.... I know you are wondering what did she purchase now, LOL! I found some of the most amazing Cavallini papers! I've admired these papers online and drooled on my keyboard so many times upon spying these, but to see them up close and personal was a paper artists dream come true! Displayed on one of the most beautiful paper racks I've ever seen and filled to overflowing with beauty, I was quickly making some of my selections. Two of this design, one of that, another one of these.......... well, you get the picture! All in all, I believe I purchased 5 or 6 sheets; perfect for my journal bookmaking and Christmas gift ideas!
From there, we headed, okay, Don followed me over to the screenprinting aisle. There we browsed, read product labels, asked questions to the sales associates. I purchase one yard of silk screenprinting fabric, a framed 8x10 screen, a smaller squeegee, and a jar of the Transparent Extender Base. I read online that if you mixed it in a 1:1 ratio with the water-based inks that it is suitable for paper and it assists with extending your inks, increases the viscosity of the ink, the smoothness of the print pull, and prevents your inks from drying in the silk screen while working.
Please note, that I am not a professional at this, just an interested artist who is learning, exploring, and experimenting. I'll be happy to share my results, answer what questions I can, but be warned, I'm learning! I've found in the majority of my artwork that the best way to learn is to read, research, and experiment. You'll discover more as you work and continue to understand what you've read and learn all the little tips and tricks along the way. It is a process, a small part of a long and hopefully, enjoyable journey!
Weekend wanderings and thoughts of Autumn...
Here it is: Monday Morning already! Wow! I'm not certain that I am understanding how quickly these autumn days seem to go by. It is something that my own mind struggles to figure out and grasp at the concept beyond it all. Making it a bit more difficult is the fact that my spirit is still is that summertime pace and longing for that lingering autumn feeling of winding down that comes in time over the next several months.
In fact, Don and I just received our first annual Autumn Weiner Roast invitation! A family friends hosts this event every year at his home in the country, and a great time is had by all who attend. {I believe last years head count total between 75-100 people.} The host provides all the hotdogs, buns, and the majority of the drinks and asks each invitation recipient to bring two covered dishes. The warmth of the day is a welcomed treat as the evening rushes in with its cooler, crisper air blowing in on gentle breezes, ushering in with it, the chiller night air. As each guest begin to arrive, table after table is lined and filled up with dishes ranging from scalloped potatoes, potatoe salads, to crockpots filled with everything from sloppy joes to chili, to some of the most amazing desserts you ever put in your mouth. The chili and warmer dishes aid in shaking off the chill in the air, while the the evening is spent talking, chatting, visiting, catching up with one anothers lives, being introduced to more people than you'd ever imagine, sitting in front of the bon-fire and singing, laughing, and storytelling. There is nothing like an autumn bonfire, good family and friends, roasting hotdogs and marshmellows! It is an amazingly fun time that Don and I look forward to attending year after sweet year!
Meanwhile back at the ranch and back to the present....
On Saturday, Don and I took a road trip to Polaris where I just made it into Michael's to purchase some Basic Grey papers during the 5 for $1 sale. As we browsed throughout the store, Don started a conversation with the on-duty assistant manager. {We seemed to have made many, many friends within this particular Michael's store and are known to have made some high dollar purchases in our visits there. } Somehow during the course of the conversation, our discussion turned to the 50% off coupon in the ad for the week and how it is hard for us to find their ad sometimes since we do not receive the newspaper the advertisements are in. When the assistant manager informed us that if we'd like to utilize the 50% coupon, arrangements could be made, we quietly talked amongst ourselves regarding purchasing a Speedball silk screenprinting kit. Don used to do screenprinting as a hobby and currently continues to do so within the business. And me, well, I'm certainly all for anything that I can incorporate into my paper arts!!! So needless to say, we purchased the Speedball Starter kit. As we left to enjoy a pleasant dinner out, our conversation was all about screenprinting. I've never tried it, however, am fascinated at all the possibilities it provides to me so you can imagine that had a hundred and one questions all running through my head all at the same time, LOL! What is this for? What does that do? How is that achieved? What makes this work and what else can I do with it? made up the majority of our conversation.
Upon arriving home, I quickly opened the kit, exploring its contents, asking questions still... while reaching for the instructional manual which I spent the next hour and a half pouring my heart and soul into, taking breaks only to ask even more questions and having even more discussions. If you cannot tell, I am excited to try this and eager to learn! A few hours later, we headed to bed to turn in for the night. By now anyone who truly knows me, knows that I'm going to lie/lay awake digesting all this information, and that is exactly what happened until I dosed off to to sleep. A few hours later, I woke up and my mind instantly turns back to this idea filled with all its amazing possibilities, so I am up out of bed and on the computer researching anything and everything I can possibly discover about it, LOL! Next thing, I know I'm feeling sleepy once again and quickly discover that it's 6 a.m.! Definately time for some sleep... so back to bed, I go.
Don woke me up around 11 a.m. on Sunday, saying something to the effect about me being a "sleepyhead" and the next several hours were spent chatting, drinking coffee, and discussing other possibilities, when Don suggested we go down to Columbus to Dick Blick's. Now, I warned him that going there could be dangerous! Having made the decision to do just that, off we went!
Upon arriving and in the store, I'm in heaven. Just turn me loose! So much eye candy everywhere, instructional and how to books abound shelf upon glorious shelf, and supplies for every conceivable art technique and style imaginable!!!! It didn't take me long to grab a cart and begin filling it with items, I can assure you, LOL! Although, I did manage to muster up a bit of self-restraint. I'll capture a photograph to upload some of my pretties at a later time...
Saturday, September 23, 2006
Change of plans...
Well, skip giving Chaos a bath! For some strange reason he is being stubborn!!! today and refuses to get in the tub. Maybe, it is because the last several times he has required one, we've taken him to the car wash where they have a Pet Spa. Now, I, personally love the idea... Warm water, a huge raised tub area which means no bending over and killing your back, and all I need is towels!!! The best part, someone else cleans up the wet mess!!! Well worth the $5 it costs to bath him....... Heck! I'd pay someone $5 to clean up the bathroom afterwards just so I didn't have to, LOL! So, I guess later today or tomorrow morning, we'll be heading to the Pet Spa.
I haven't gotten a darn thing done today...... well, that isn't entirely true! I checked my email, did some email trashin', posted on a couple message boards........ browsed some blogs, visited a few favorite websites to see if there was anything new to view, read, ect.
Came up with an idea for my Postage ATC's.... but have yet started creating them. Guess I need to get off the computer, huh?
Good Saturday Morning!
I am up early as usual... actually I've been awake since 5:30 a.m. enjoying my morning cup of fresh brewed coffee, the stillness of the day, the quiet.... Okay, so it lasted only a few hours, prior to Chaos waking up. He has this thing where he believes if he is awake, the entire household needs to be too. Don and I take turns, if I'm not out of bed before he is, getting up and closing the bedroom door so the other one can sleep in for bit longer. He definately has an internal alarm clock, 7:30 a.m., no matter what you do to keep him awake or how much you try to wear him down.
I need to capture a few pictures of him. He is getting HUGE! He isn't a tall dog, but he's long.... I also have to say that he is approximately 80-85 lbs. now, so handling him sometimes is a whole 'nother challenge. I spend some time on an online message board for Laborador's and most are recommending a no-pull harness for puppies. Can you believe he is still classified as a puppy? Just one month over a year old... it is hard to believe due to his size, but his behavior and attitude says "puppy" all the way. Have I mentioned just how rambunctious labs are? They definately require a certain type of person to handle them; they are very active, and there is a saying that "a good lab is a tired lab" and trust me that is so true! Wear them out!!!! One thing that I do try to stick to is a 5 minute rule: 5 minutes of excercise times every month of age. That means at least an hour of exercise a day ---- which doesn't take too long when your throwing a ball! Don't even go there unless you have at least a half an hour to spend doing so.
Anyways, enough about our nut case dog who lives up to his name!
Today's agenda:
- Give Chaos a bath! --- Okay, typing that was the easy part! Doing it = something else altogether.
- Clean up the bathroom after the fiasco!
- Rest! {A hour and a half should do it.}
- Clean up the house; take something out for tonight's dinner, and fix a light brunch so Don can eat before going into work.
- Get some stamping and ATC's created for the Postage ATC Swap.
and deal with whatever transpires in the middle of it all! I hope your morning is as glorious as mine! {smiles}
Friday, September 22, 2006
Celestial themed
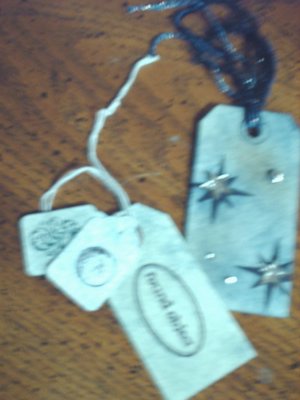 I like this star stamp and normally emboss it with either gold or silver EP, but since I didn't grab any embossing supplies in my creative frenzy last night, I made due by adding in some jeweled stars. The other tags just seemed to co-ordinate so I stippled them using a similar color scheme.
{Note: the colors of all these tags and envies are a bit off. I needed to turn on an overhead light and use no flash to capture these images. It is a rainy, overcast day here in Ohio but it provides you with an idea of the artwork I've created.}
Tags and Envies...
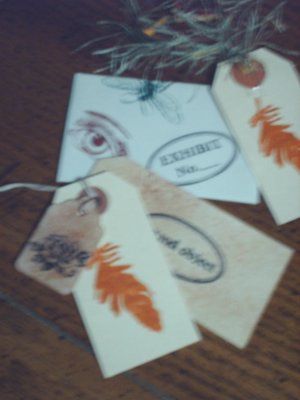 More of the same stamped tags and one envelope. The found object stamp and the exhibition no. is from a Stamper's Anonymous cube.
More Tags...
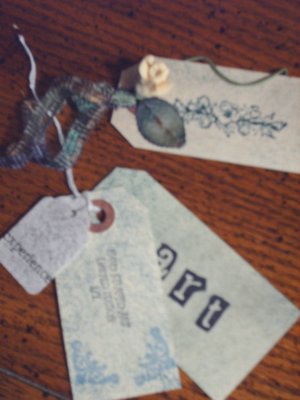 I really love the old feel of the tag in the background. I think I'll have to walnut age a lace doily or use a doily to place this one upon. The other tags are simply stamped and stippled with ink, while one contains a rub-on word to co-ordinate.
Envelope and Tags
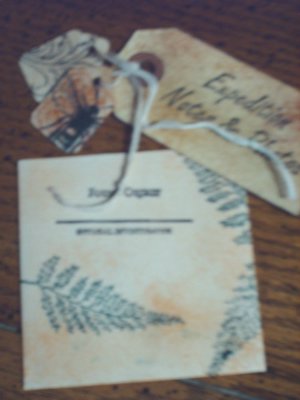 This was created from using a long white envelope, I sealed them shut and cut them in half so that I could decorate more of them using a smaller scale. Additional tags were created, however, I grouped them together with envelopes and additional tags that I felt worked well together. I imagine that I will one day add some of these to some altered books.
Doorplate Keyhole Photo Frame
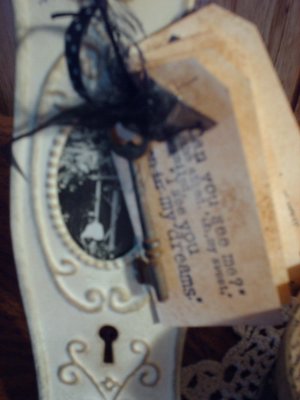 I have had these keyhole doorplate frames in my studio for a while as well. After stamping some of my favorite Cat's Life Press rubberstamped quotes onto some tags, I thought it would be adorable to add an antique skeleton key with a bit of black sheer ribbon and some black eyelash fibers to dress them up. The quote on the front of the tag reads, " Can you see me?" she asked. "Oh my sweet," he smiled, "I see you even in my dreams." In the antique photograph is an old man which inspired me to add this. It reminds me of someone's grandmother whose loved one has passed on yet she is able to feel his presence surrounding her.
Love Potion #9
 Although I had previously created this bottle, today I decided to embellish it further by adding the burlap to the bottle cap, tying it on using jute string and a bit more of the black eyelash fibers. Sifting through my embellishment cases for embellies for the tags I created last night, I came across this old stone piece that I had saved from an old mood ring. I instantly knew that it was the perfect thing this old Love Potion bottle needed!
Coming Soon: Some new arty creations.....
I was a little restless last night so I headed out to the studio and grabbed a box of stamps that would fit into a 12x12 drawer, a variety of inks, and a lot of tags and envelopes! I sat and stamped and stippled with ink to create some pieces that can be embellished further and use within a variety of artwork projects.
I have gone through some phases with this way of creating, thinking I should create some smaller things for use in some bigger projects, but last night is the first time I've really acted on the idea without a specific project in mind. Unfortunately, my scanner isn't working.... I may have to re-install it completely. So, in the meantime, I've decided to continue to embellish and once they are finished, I'll capture a digital photograph of them; hence, the "Coming Soon" caption....
I also think that I may have stumble upon a really cool stamped design that I can use to create the Postage Stamp ATC's! Creating them is my next project so that I can have them postal before the actual due date as they will be going to Canada.
I also heard that I've an Art Idea Journal from the RR heading my way... Whoo-hoo! with that one, I've two to go. It has been an absolutely amazing journey with this RR..... 17 participants, over a year and half in the making, and now being in the home stretch! I am excited knowing my own journal is only one participant away from me.... in the hands of the girl who mails to me! Come home to momma, Baby! It will be an adventure in and of itself in figuring out how I will bind it into a book. I blogged regarding some thoughts and ideas previously..... just need to re-read and re-evaluate them when the time comes.
I am desiring to begin working on creating some Christmas gifts soon. I don't have a lot to do; just enough to keep some of the expenses of gift-giving down using items that I already own and my own two hands! So, I'll be slowing down a bit on the swapping for a while until these things are created.
Something else that has been on my mind for quite some time now is to possibly open up an Etsy shop. I've some ideas for some handmade items that I can create and add. I don't think that project will be started before the New Year, but I am considering all the possibilities of doing it. I just need to get my butt in gear and get those ideas out of my head and created. In the meantime, I can be setting up everything else that it will take to make it successful, such as the packaging, shipping, and mailing of items. And start creating them..... I guess I'll never know if it will be a success unless I just do it!
Tuesday, September 19, 2006
Little things...
That is the main focus of my attention lately. Not on what can I purchase, but more on what am I able to do that will assist making our house more warmer, cozier, a place where one desires to rest and relax. I honestly am finding that it is in the simple, mundane, everyday things that I can so easily overlook and take for granted.
Just like today, take making breakfast for instance... I love to make breakfast! Don't ask me what it is about that one meal out of the day but it is my favorite to cook. We don't eat breakfast everyday, maybe 3 or 4 days out of the week, I really want it. Nothing too elaborate, a couple pieces of breakfast meat, either bacon, ham, sausage; some fried potatoes every now and then, and eggs! Add in a couple slices of toast; white or wheat and I'm in heaven! Well, today was no different than any other day that I cook breakfast really but what was different is that I really set the table! Doing that simple act provide both Don and I a more laid-back feeling, not having to feel rushed, just the enjoyment of doing, seeing, and enjoying it that made it special. Maybe because it is the first time in a long time that instead of throwing everything on our plates and taking it to the table, I actually set the table, used additional bowls, plates, and serving utensils, LOL! It was then that I was reminded once again that it is important to take the time to do those little things that make you feel good. Yes, it is a little extra effort... but so worth it in the end.
Just like today, take making breakfast for instance... I love to make breakfast! Don't ask me what it is about that one meal out of the day but it is my favorite to cook. We don't eat breakfast everyday, maybe 3 or 4 days out of the week, I really want it. Nothing too elaborate, a couple pieces of breakfast meat, either bacon, ham, sausage; some fried potatoes every now and then, and eggs! Add in a couple slices of toast; white or wheat and I'm in heaven! Well, today was no different than any other day that I cook breakfast really but what was different is that I really set the table! Doing that simple act provide both Don and I a more laid-back feeling, not having to feel rushed, just the enjoyment of doing, seeing, and enjoying it that made it special. Maybe because it is the first time in a long time that instead of throwing everything on our plates and taking it to the table, I actually set the table, used additional bowls, plates, and serving utensils, LOL! It was then that I was reminded once again that it is important to take the time to do those little things that make you feel good. Yes, it is a little extra effort... but so worth it in the end.
More ideas....
As I worked around our house, dusting, vacuuming, doing all the boring stuff, LOL! I got to thinking about another thing that I am literally not too happy with currently. The TV! Now I love the TV; don't get me wrong there --- I hate the stand beside it that holds the electrical components. I have thought for years about how I'd like to one day have and entertainment center surrounding it and always envisioned one with cabinets below, shelves above flanking it on both sides and a bridge across the top, only to get discourage on where the heck I'd place it within the room!
For some strange reason today, the solution simply came to me. One piece of cabinetry, on one side, with shelving the height of the TV, a bridge overtop for a nice table top display --- possibly something as simple as some greenery and a hurricane vase with a candle, and a single sheet of wood down the opposite side. The cabinetry wouldn't necessary have to be made too wide, approx. 16-18"; just enough to hold the CD player, digital cable box, and the surround system. A small cabinet on the bottom wouldn't create a large area for a lot of clutter either! So, don't be too surprised if you read my blog sometime next year and I'm trying out my woodcrafting skills, LOL!
For some strange reason today, the solution simply came to me. One piece of cabinetry, on one side, with shelving the height of the TV, a bridge overtop for a nice table top display --- possibly something as simple as some greenery and a hurricane vase with a candle, and a single sheet of wood down the opposite side. The cabinetry wouldn't necessary have to be made too wide, approx. 16-18"; just enough to hold the CD player, digital cable box, and the surround system. A small cabinet on the bottom wouldn't create a large area for a lot of clutter either! So, don't be too surprised if you read my blog sometime next year and I'm trying out my woodcrafting skills, LOL!
It has been a busy day!
I awoke at 5:30 a.m., however, quickly climbed back into bed and off to sleep once again until about 6:30 a.m. That is when the alarm went off, as Don would be driving my dad to and from the hospital for a minor surgery today. Anyways, a while back my dad went to the ER with something irritating his eye. Upon administering an eye wash and prescribing him an antibiotic drops to apply to prevent any possibility of infection, he was referred over to Dr. Burton, an eye specialist. Dad had an appointment with him several weeks ago, and during that visit discovered he is developing cataracts and Dr. Burton decided to remove them before they became worse. So, today was the first surgery to remove one on one eye and the second will be done at a later date. Dad went through the out-patient surgery well... came home this afternoon with a minimal amount of pain after the procedure. He returns tomorrow for a follow-up post-op visit where he will discuss the condition with Dr. Burton and I assume preparations for his follow up care and upcoming surgery.
Unable to go along because the only vehicle we have running is the Ford Ranger and it is a standard and small to say the least, I stayed at home and kept myself occupied. I've started on my fall cleaning; just a bit here and there, mainly in our kitchen since I am desiring to get in there soon and tackle painting the remaining part of it. Made a wonderful breakfast of bacon, fried potatoes, and eggs, cleaned up the dishes afterwards and swept and mopped the floors.
While I worked, I kept thinking about the decorating that I am desiring to do around here. After the kitchen is finished being painted red, I'd like to explore my options for new curtains. I have yet to make it to Calico Corners where I seen the wonderful fabrics online that I loved. I'm thinking I'd rather sew them or have them sewn vs. purchasing them. One of the reason is I'd love to co-ordinate them with some placemats and seat cushions. I also thought that I could use some scraps on some dishtowels and just a little country charm here and there. This sort of surprised me, the country theme --- I've always liked the look but not the clutter. Now, I'm not talking total country... just an eclectic mix with a bit of country! I am intending to keep my rooster theme...... I'd just like to add a few things. Maybe a braided rug under the table, a few woven rugs, on in front of the sink and another at the back door... just to assist creating that warm, cozy, nostalgic look. So I did an internet search for some, I did find some at http://www.countrystylehome.com in a barn red; nice but not quite what I'm wanting. Isn't it strange how that works, you get this picture in your mind and cannot get it out. You know what you want, yet cannot find it. Well, I know in time I will; I just have to have some patience. But I did manage to find a few items that I am desiring. From www.tenderhearttreasures.com I found the perfect set of mixing bowls! The item # is 107687 Autumn Riches Mixing Bowls and are $34.95 for a set of 4. I will definately will be ordering these soon! I absolutely adore the colors, the functionality of them, and the style. I, also, found a few other items that I thought I'd put on my Christmas list:
- #104126 Curved Rattan Basket; priced at $5.95
- 107853 5" Rustic Primitive Star Ornaments; priced at $7.95
- 104758 Estate Green Bird Hook; 3 pc. set; priced at $12.95
And this, I love! I have desired one for a few years now ever since I first laid eyes on it! It is #109826 and called Swan Embrace. It is a wood carving of two swans. I've seen this before and remember the story behind them. The first time I seen them, I remember them being called Soul Mates, and the story is about how swans mate for life and the one broke its neck on the ice and the other swan stayed with it and mourned. I know it's sad, but so touching! This is the most reasonable price that I have found this piece for at $49.95; the Soul Mates one was well over a $100.00!
I also got to thinking {because of the painting in the kitchen} about the can of yellow paint that I purchased when I purchased the kitchen paint. I belive I have finally came to a suitable answer for using it within the living room! I know I've talked about this room before and how it is my biggest decorating challenge and I've decided to treat it as two separate spaces. Well, today, while resting on the couch, I got to looking at the way the light was hitting my gold sheer curtains, and it simply dawned on me! Instead of sponging, glazing, faux-finishing, what about painting only the bottom half of the wall! Sort of like a chair rail style. Well, trust me, it wasn't long after that thought that I was looking at the two walls that are painted and realized that it wouldn't take much in wood trim to add one to them. The west wall has the large picture window and the south wall has the front door with a window on each opposite side of it. Without even measuring, I'm thinking 11 1/2' wide x 30' long, minusing the width of the windows and door, I could get by with purchasing about 4-8' sections of trim! Not too shabby! A low finance project with big impact! Right up my alley....
Monday, September 18, 2006
Weekend wanderings and other thoughts....
Our weekend seems to have once again flown by..... Friday spent at a yard sale with Amber and Alexxis, and upon returning home I decided to keep "Doodlebug" and give mommy a much needed break. Alexxis is becoming such a fun little girl to hang out with and to enjoy. She is discovering more and more of the world around her. She reaches and grasps everything in her way... including grammies bi-focals, LOL! Her hand and eye co-ordination skills are continually developing, she learning to be more vocal. Her newest thing is "growling" LOL! It is so funny! You look at this sweet adorable little girl and out comes this growl to which she giggles with delight! She is beginning to eat! Baby food jars of fruit, fruit juices, and cereal make up the majority of her diet, although she still loves her bottle! I had her until 9:30-10 o'clock and if it wasn't for Chaos making such a ruckus while outside, I would have kept her overnight.
On Saturday Don worked while I felt truly inspired. I got nothing new created but the ideas for creations seemed to pour out of me. If only I could create theings as fast as I envision creating! Don returned home and desired to take me out for dinner since I've been dutifully working away in our home the last several weeks, so we took a short road trip over to Lexington to eat at the Dutch Heritage restaurant. Delicious Amish cooked buffet...... yumm! After eating, we drove into Galion and visited with Dennis and Sheila for a while, catching up with one another's lives before returning home to rest and relax.
Yesterday, we spent some time in the morning and early afternoon watching TV. I watched a few episodes of Wive Swap. This is the first time I have watch this reality based show so I was a bit surprised by how different some of the people being featured on this show live from our own daily lives. I could see how life truly is made up of being in a constant state of determining balance so I guess that I too walked away with something from watching it. In the afternoon, Don was restless and suggested we take a drive...... one of those going-no-where-in-particular rides.
We ended up in Lima, Don desiring to drive to Ft. Worth! I persuaded him to stay in Lima where we ventured into Pier 1 Imports and simply browsed. Another stop into TJ Maxx where I picked up Alexxis a new outfit ---a pair of pants, a top, and a vest set --- in a 12 months size. Hopefully, that will get her through the winter. As we headed back east, towards home, neither of us desiring to come back too early, Don suggested what I was thinking about, stopping in Kenton at KMart. We browsed there, I found two more outfits for Alexxis...... both reasonably priced, one 2pc. reg. priced 4.99 each for a sale price of 2/$7 and another pants and shirt for $9.99. I ventured into the Toys Department and found several things on clearance and another couple of toys for regular price. I found a Fisher Price light up musical stacker, a mucical toy that plays, "Itsy Bitsy Spider", a Baby Eistein Frog that sings, counts, and says the alphabet, and a child's walking assisting toy that feautures a multitude of other things, and a pull along caterpillar. Some of the toys were age appropriate for her.... 6 months, while a few of the others were items she will grow into. I also found some fleece blanket sleepers with the feet in an 18 month size, so all these things went into a layaway for Christmas.
Upon returning to our hometown, I stopped at Amber's to give her the 3 outfits I'd purchased for Alexxis. I thought that it would help to ease her mind a little, as I know that they are struggling some financially. Chris was recently laid off from his job and Amber is still looking for something part-time so she can spend some time with Alexxis.
My heart feels so heavy for her. She is becoming depressed, and tearfully tells me that this isn't the life that she envisioned for her daughter. I feel terrible, wishing that somehow I could help, yet knowing that I am doing what I can, when we can - to try to assist them and that we cannot do it all for them. It is so hard sometimes, drawing those boundaries ........ although I know Amber is grateful for what I am doing, I can sense a kind of resentment towards me for doing what she isn't able to do right now. She has been self-reliant for a long time.... even working full-time while in high school, earning and saving for her car, insurance, clothes. Of course, I've always been able to help off and on and ease some of the tight spots, I know going through this stage in her life is difficult for her.
I try not to say anything... not desiring for her to take my intentions the wrong way. I know she feels like she has let herself, Chris, and Alexxis down and doesn't need me to interfere. I struggle with those boundaries daily... when to say or do something, how much is enough and how much is too much. And I know I have to let her go and figure some of these things out on her own. It is just difficult to see your children unhappy........ yet Alexxis certainly knows how to bring a smile to face and make her realize what is truly important in life! In the meantime, I do what I can without being taken advantage of, and watch as their lives unfold, knowing someday it will all come together for her and regardless of it all that I am here. She isn't too comfort with that right now but still appreciates it.
I honestly believe this is probably the hardest thing that I have ever had to do in my entire life... let go of my child. You think that you're ready for it when it happens, then miss them so terribly, try to be there and guide them.... gently yet not step on their toes in the process. As a mother you just want to wipe all their pain, their tears away, and tell them that it is going to be alright, and encourage them a little bit more to never let go of their dreams.
Saturday, September 16, 2006
Tinnies..... revisited...
I don't know how I could forget about these. Tinnies! I remember when I first saw them in the pages of Somerset Studios created by Lisa Kaus! These are the most adorable little containers that offer up a lot of possibilities for organizing within a creative space but what their use as a decoration within one's home?
I can see the smaller mushroom and black olive cans being used as Christmas tree ornaments. Remember my circular box ideas..... adding in a syrofoam snowball or a wooden round bead? What about filling the inside with florist foam, adding in a few small floral picks and topping with one of these for a face? Adding in a cone shaped hat? and hanging on the branches of a tree?
Of course, these could be used on a tabletop as a centerpiece too. Filled with lights, potpourri, and a candle. And what about tiering them? Wedding cake style? Okay, you'd have to turn them upside down, use a few different sized tin cans but you could hot glue them together so they wouldn't easily be knocked over. Punch some holes in the surrounding sides of the can above and poke some floral picks in there, layer as many as you'd like and add a small wooden candle holder to hold a taper candle or skip that and simply use a small pillar candle!!!
Another idea....... gosh, where is this coming from???? What about a pastry-style plate? Use the tin cans in the same fashion as above, from the lagest to the smallest, and add a variety of sizes of plates inbetween. Of course, you'd decorate the tins with paper, or spray paint in silver or gold or whatever color theme you're using in your home. Line the plates with tissue paper cut in the circular shape {easy enough using the plate as a template!} and decorate with either fruits of the season or baked goodies! Yummm....
And while I'm one the subject of "creative" decorating, I remember years ago I filled with home with luminaries made of canning jars. I purchased a bag of children's sandbox sand to fill them 1/3 of the way full, added a candle to the inside, and piece of decorative Christmas ribbon tied to the outside of the tops of the jars. I used these both inside and outside of our home. The sand keeps them from toppling over and extinguishes any stray sparks from the candles. The ones I added inside of our home were additional decorated by simply laying some sprigs of greenery, floral sprigs, and/or placing a shiny ornament beside its base.
And I cannot forget dressing up gifts! I love the wide wire ribbon available at this time of year and tend to stock up on it after Christmas is over. I love to use it sparingly around a few specially choosen gifts to decorate.... it adds a festive feel to the gifts under the tree. Bows created are always nice but tuck in a floral sprig and it's heavenly. Cinnamon sticks wrapped with a thinner ribbon and a floral sprig add another simple yet elegant touch!
Speaking of my gratitude garland...
No, I've been neglectful and don't have any new links to share, but while typing the previous post I got to "thinking about it!" LOL! I began to wonder when was the last time that I created any new links for it? So, I checked my August archives {see it is a good thing that I post them here :) } and discovered it was August 10th!!! Anyways, the point that I wanted to make was an about another idea that came to me and related to my previous post.
Remember the stationery suitcase? What about using a box? Similar to my Partly Paper inbox? Boxes from food are plentiful enough.... stuffing, potatoes, rice, cereal, ect. Simply cut, cover, and decorate. Add in a some writing tablets, note pads, a card set, postcards, envelopes, gift tags .... and another inexpensive gift is born!!!
For additional decorating...... add a smaller scale garland or banner by punching a few small holes and tying them on or adhering in small sections. Or make it even more decorative by adding smaller paper medallions and allow either to swag in places!
And these boxes wouldn't necessarily have to hold a decorative stationery set either. Add in a candle and surround it with potpourri!!! Heavenly! I can see them now in an Autumn theme, with an autumn colored scented candle and smelling of spiced apples. Christmas themed ones would be cool, too, in holiday colors, images of Christmas past using Victorian diecuts and clip art filled with a candle, floral picks, and/or even used in place of a Christmas stocking. Wouldn't they make a cool centerpiece for a holiday table? Simply cut out a square on the side of the box instead of standing and filled with greenery and a candle for some glowing ambiance
or a string of Christmas lights with potpourri to cover them? Hmmmm........ who would have thought I'd think of all of this from a simple cereal box???? ROFLOL! I can see these in my creative mind now...... covered in a variety of papers, christmas gift wrap?, glittered hearts and stars. And how about that string tinsel? The kind manufactured for the miniature trees? Easily added as a trim for the bottom, top, or to swag around the sides of the box!!! Small 3D ornaments dangling from it......... OMG! I need to stop, my mind might explode! {smiles}
Mystical musings....
After sharing some of my recent artwork, {gratitude garland, artful banners, paper medallions, stationery suitcase, and my latest collage} I quickly realized that a lot of these items would make terrific gift items... especially as the Christmas season is right around the corner. My thoughts quickly turned to how can I re-create them in a way that first isn't too time-consuming --- if I'm going to be creating them, I'll need time to do that and secondly, how to keep my expenses down. Let's face it, if it is going to be costly to create these things, wouldn't it be easier to simply use the money and go shopping instead... there is a lot less stress involved there, LOL!
I got to brainstorming and realized that some of these things could be created in a big way only in a smaller version and using some additional things to personalize them and speed up the process.
The garlands: either the ring style of the gratitude or the artful banners can be made smaller. Can you envision them in a smaller scale? What about a 1/2" x 3" style for the ring one? You could cut a lot of them out of a single sheet of printed paper and cardstocks, use colors that would match the recipients decor and personalize them by themes. If I used staples to create the rings, they would go together fairly quickly and creating a 4 or 5 foot one which could drape over a curtain rod, dress up a shelf, or add a ribbon or fiber hanger to them could be hung on a wall using simple push pins, hung over a picture grouping on a wall.
The artful banners could also be created on a smaller scale and I think that they would be adorable hanging on the edge of a shelf. The banner style itself hosts a lot of possibilities, what about using circles, diamonds, a rectangle with a triangular cut out to resemble the cut ends of ribbons? Again, very easy to personalize! Colors, themes, sizes... A package of scrapbook embellishement would assist with the smaller scale and stickers for images wouldn't be too awful expensive, right?
The paper medallions.... oh how I am loving these! So easy to create and they can adorn almost anything! I can even see them added to the joined spaces between the artful banners, on a gift tag, a gift bag, as a jar topper. Paper choices are fantastic, anything from vintage documents, wallpaper, sheet music, book pages to simple scrapbook printed papers. Then my mind began to wonder with even more possiblities... can you see them layered? This puzzled me for a moment as I realized how they are folded and the thickness of the center when it dawned upon me that as it being folded and before it spread out, why couldn't you simply cut out the center, layer it and insert each fold into the pleats of a previously created one? The circles would be easy to decorate..... and who says it has to be a circle? A square, a rectangle, a triangle would easily work as well... and decorated again with simple pre-made scrapbook embellishments and/or stickers. Those banners that drape below, could easily go over top. Personalized with any words related to themes, seasons, occassions. I couldn't resist thinking of the possiblilities to use some stamping techinques either. Polished stone backgrounds, embossed crackles.... especially embossing and glittering! The glitter truly makes them spectacular! What about glittered diecut shapes? Can you see stars and flowers shapes within the designs? A couple holes with string, ribbon, and fibers strung through and you've got one amazing Christmas ornament! A set of 3, and yep, it is a gift! I then remember the little matchbox that I originally discovered the medallions upon, and my mind quickly raced with a few more ideas. Creating a shrine inside of a matchbox, adding a glitter outline shape to create a miniature shadowbox within. Add in ribbon adhered to the edges and more ornaments abound. Well, the box idea is a great one and we all know that they come in a variety of shapes and sizes in paper mache. I started envioning them in the small circular sizes, decoupaged with papers, a paper medallion used as a collar for a styrofoam snowball decorated with a face and a cone hat! A larger wooden bead would also work! and robbins, fibers, strings adhered around them add an additional decorative touch. Even a small hole, made in the top layers and punched through the lid would allow you to create yet another ornament! Adhere the inside top of the lid to the top of the box and viola, it wouldn't come apart! Of course, they would have to be glittered!
The stationery suitcase.... well as much as I'd love to be able to create one these for all the ladies on my list, it simply isn't going to happen. But then I remembered that Stampington? possibly, or Mirkwood maybe ?, anyway one of them offered a template for a suitcase created from paper. {I'll post again when I rediscover it!} Any container would work, a paint can, a wicker basket, a lid to a box or a box itself. Of course it would need decorated!!! I thought about how a garland or a banner would look hanging along the upper edges, or a paper medallion decorating all four sides!!!
The collages....... well, in all honesty, these would be the easiest and the fastest for me to create. The supplies are inexpensive enough, I've an entire box of the frames as I picked them up a few summer ago while I was at the flea market! I remember Linda and I went in on the box for a $1 each and split it..... I wondered then what the heck will I ever do with 48 frames? Well, once we split them, it was 24 and I've gave some away. Those frames are neat! as in they are deep! I could even possibly turn them into a shadow box as the back opening is larger than the front. Of course, I'd have to trim the back easel section of the frame to fit the front opening and remove the photo turns from the frame. I thought a piece of matboard frame could easily be hot glued to them and decorated as well. The illustration boards aren't too expensive and are available usually in a package of 4. I've a lot of paints on hand and tissue paper! Use my own stamps and another gift is born!
Lots of ideas and inspiration.... and knowing that if I don't write them down, create sketches, they will quickly vanish... so that is what the purpose of this post is about: a gentle reminder! {and perhaps to inspire someone else....}
Wednesday, September 13, 2006
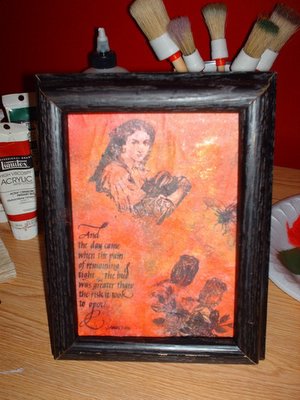
While waiting for my paint to dry...
I believe I'm heading back out to the studio to look for a woman's face image, a rose, and the bee that I dreamt about. Funny, how my mind interpreted the rubberstamp supplies that I own. Gotta love that! Oh, and Staz-on ink........ {*be back soon}
Same ole' Collage background...
 only I went back into the wet paint with a paper towel and lifted some of the wet paint so that music sheet and the ledger paper shows through a bit more.
When my muse calls...
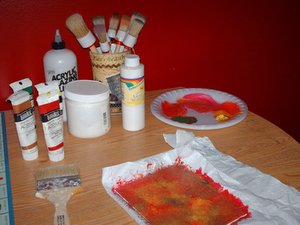 I've learned to listen, silently obeying, and shoo-ing away the questions in my mind. I ventured out to the studio to grab some of the necessary supplies that I would need to get started on this. I gesso the canvas board, only to cover it using some ledger paper and a piece of sheet music, then stippled red, green, gold, and orange over it. It isn't as red as I envision, however, I may go back over it with a thin layer of acrylic glaze and gesso mixture, before switching over to a red pigment ink. At the moment, I am waiting for this to dry! {See, I told you... only in your dreams does paint dry so rapidly!}
Creative dreams...
What does red, green, gold, and a hint of orange paint, images stamped in black staz-on ink upon tissue paper, and acrylic floor polish have in common? A dream! I woke up dreaming about a wonderful collage that I was I happily pouring my heart and soul into.
In all of about 5 minutes, I lay in awe of the short amount of time it took to create this... {That is the wonderful thing about dreaming about creating art....... there is no time spent waiting for things to dry! LOL!} I created with abandon as I painted a base coat of red acrylic paint around the edges of an canvas illustration board. I sang {out of tune, of course!} while stippling on a beautiful shade of green, mixed with an olive green; then moved onto a new stipple brush filled the most beautiful shade of yellow withjust a hint of a golden brown, --- so that it glowed like gold. Another stipple brush, with a trickle of bright orange just to add the right amount of contrast formed an amazing background. {Hmmh, maybe I'm seeing so much Basic Grey paper in the publications I've been reading...}
A ladies beautiful face stamped using black Staz-on onto tissue paper and adhere using Golden's Gel Medium over the background and the tissue paper simply disappeared. A layer of Future floor polish, and another image, this time a beautiful red rose was added, before another layer of acrylic sheen. Last but not least, was a beautiful bee stamp added to the lower right corner. In my dream, this was the most beautiful collage, filled with depth and crystal clear. Hmmm, maybe I'm on to something........... I'll have to look in the studio today to see what I have to play with and go shopping for some floor polish!!! Anyways, my dream was so vivid it seemed so real that I woke myself actually reaching out to touch this amazingly beautiful collage. What a way to start my day!
Tuesday, September 12, 2006
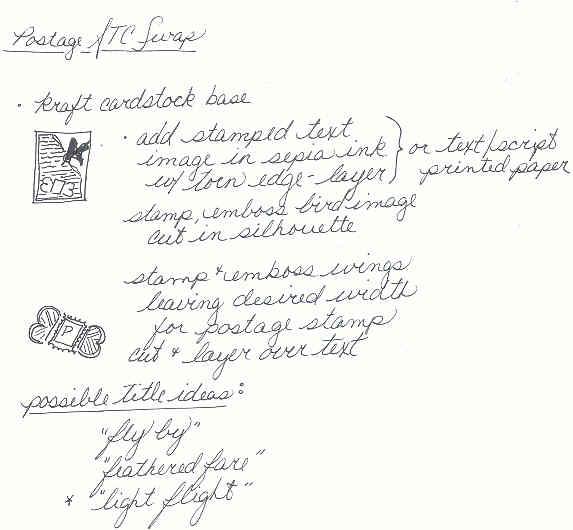
It feels great to be setting some artistic goals and meeting them. Today, I mailed out Lianne's deco, Vicki's Art Idea Journal, my two swap participants packages in the Variety Collage Swap, and Lisa's ATC's!!!!!
I have almost 30 days before my next swap is due to be postal... a Postage ATC Swap. While I sat and sketched some recent ideas for cards, I quickly realized that those same sketches could be used for ATC's --- only on a smaller scale. I instantly felt drawn to one sketch, so I expanded on the idea by drawing out the thoughts I was envisioning. This is something that I hardly ever do... but as I worked on the sketch, ideas began to flow regarding ink colors, technique ideas, ways in which to embellish, and some possible titles for the ATC itself. I thought it would be fun to see both the sketch as I envision it and just how close the actual ATC that I will create will be. You see that is one of the things I have a quirk with when it comes to sketches, I can't seem to follow them to the letter, LOL! I always think what if I add this or change this just a bit. Therefore, I often just wing it!
Monday, September 11, 2006
My hand for Vicki's Art Idea Journal...
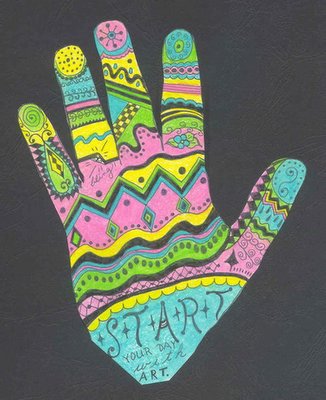 Whoo-hoo! All my pages for Vicki's Art Idea Journal are completed. I created her a Whimical Writing alphabet; stamped images using the Mona Lisa Odorless Mineral spirits, and this hand. Vicki's journal contains a lot of hands..... sort of a central theme that developed as each of us worked in her journal as it circulated. I desided at the last minute to color my hand in using the same technique! Enjoy!
Halloween ATC's for Lisa...

I created these two Halloween ATC's ahead of time for sending to Lisa. The first was intended to be on the reverse side originally, however I liked how the crow image appeared in the orange glow surrounding the old haunted house and decided to keep it! The second was just a fun image!

Today's creative to do list...
Finish Lianne's deco... check.
Prepare the envelopes for the Variety Collage Swap... check.
Finish my pages in Vicki's journal.... yet to do, and maybe beginning working on the Postage ATC's --- so I can mail them out too. I also want to create Lisa Renea's Halloween ATC and get it postal along with the "letterhead" image I previously created for her with another surprise!
Lianne's Deco page created by me....
 Lianne's Deco's theme is Favorite Childhood Memories so I brainstormed regarding some of mine --- chasing butterflies with a butterfly net, reading books while lying in the grass, watching the clouds go by, climbing the tree in Mrs. Short's backyard with Carol to sit within it's branches while singing, "On the good ship - Lollipop!" and going to the lake almost every year with my family. I choose the lake memory because it is the most consistent memory as we went practically every year. I stamped a D. Morgan rubberstamp image, colored it in with Prismacolor pencils, softened it with Mona Lisa Mineral spirits. I adhered a sheet of white vellum to continue the feeling of a childhood memory remembered and journaled using a black slick writer the following words, "Summer's spent at the lake.... singing, dancing, twirling in the sun and the sand." I adhered a small piece of sea glass and two tiny seashells to the vellum to embellish and created a quick sketch of a small child twirling in the sand. I hope she likes what I've created!
September 11th
After returning home, we sat and relaxed in front of the TV. We watched a documentary on the first Fire Station on the scene of the World Trade Center Terrorist Attack. It was an interesting and intriguing story providing a different viewpoint from the day that I remember from here in Ohio five short years ago. It was touching to see the compassion, the efforts, the scene as it was unfolding and played out... even if it is now and was then, so heartbreaking to standby and watch.
I can remember that day so clearly in my mind. It was a gorgeous day, unlike any other. The bluest sky that I ever remember seeing, the warmth of the sunshine, the sounds of the birds singing in our own backyard as I went about my morning routine. I remember that I had put a roast in the crockpot to cook shortly after I had awoke and I was in the process of checking it when the first newsclip of the day occurred showing the image of the aircraft as it flew into the first of the Twin Towers. Startled by what I was hearing vs. actually seeing, I stood in disbelief, not really paying attention to what I was I was doing, but listening to the TV. Not believing what I was hearing, gripped by surprise and disbelief, I was jolted back to reality as I lifted the glass lid on the crockpot and a stream of hot escaping steam rose to burn my hand. I quickly went to take care of the injury and soon thereafter settled in front of the TV, watching as so many other Americans did, with tears streaming down my face as my heart lie breaking. I watched in horror as I saw those who jumped to their deaths vs. being consumed by the raging fires that consumed the towers. I sat motionless, entranced by the events as they unfolded, as first one tower collapsed, the the other. Continuing reports of two other hi-jacked aircrafts continued until one had reached the Pentagon and one was still in the air over Pennsylvania filled our living room and touched our souls a little deeper. It was like adding salt to already open and throbbing wound. I cried, I worried, and I prayed like I've never prayed before in my life.
The day unfolded, filled with disbelief, and a sense of what the hell is happening, and wondering when and if it would ever be over. I don't remember much more about day... like many I somehow got through it, numb and shocked and heartbroken. I do remember laying awake in bed that night, my hand covered in Silvadine soaked gauze, burning from the burn I had acquired by not paying attention, and feeling survivor's guilt as I thought about how I hurt and how I was being so selfish, when there were people laying trapped beneath the rubble of what once was --- burnt and broken with no way for anyone to even attempt to get to them. I fell asleep, with tears streaming down my face and prayers being offered up to God for each and every soul to keep.
The pain of September 11, 2001 still haunts me. The heartache and the grief. I still go through the process of grieving, feeling the depression, the anger, bargaining with my own thoughts, wondering why it all happened and even how God could allow it to happen in the first place. I tried deny it, not wanting to believe it was so, like a re-occuring nightmare that you cannot wake up from to finally being able to accept that it actually happened. It has been five years since that faithful day and I, like many other Americans, will never forget.
I don't attempt to understand it anymore, I don't question God, and I don't justify it with "what if's" and "what should have been's". I simply pray that no-one on the face of this earth should ever have to experience anything like it ever again regardless of their race, their religous beliefs, or the color of their skin. I pray for peace in a world filled with hated and violence. Some days, I even wonder if it helps, but I know somewhere in my heart that it does. As I remember the compassion of strangers, those who laid their own lives on the line to save so many other strangers who they would never know. I've seen the out-pouring of love, I've heard the compasion and witness the reaching out and helping hands as we each help one another cope with the aftermath and the remains of what once was. I remind myself of the person who I desire to be and to become and I strive for that within my own life. Each and every day gets a little bit easier to deal with, the heartache and the pain lessens, while the memory of it all lingers in my thoughts and in my prayers. And I celebrate, just as I cheered when the last plane plunged into the Pennsylvania ground, with mixed emotions, heartache, yet a sense of "It's finally over." Five years later, I wonder if it will ever truly be over. Yet, I continue to pray for a world filled with peace, where people agree to disagree without waging war on one anothers hearts, minds, and their souls. I imagine what that world would be like where everyone reaches out to ease the pain instead of inflicting it.
Subscribe to:
Posts (Atom)